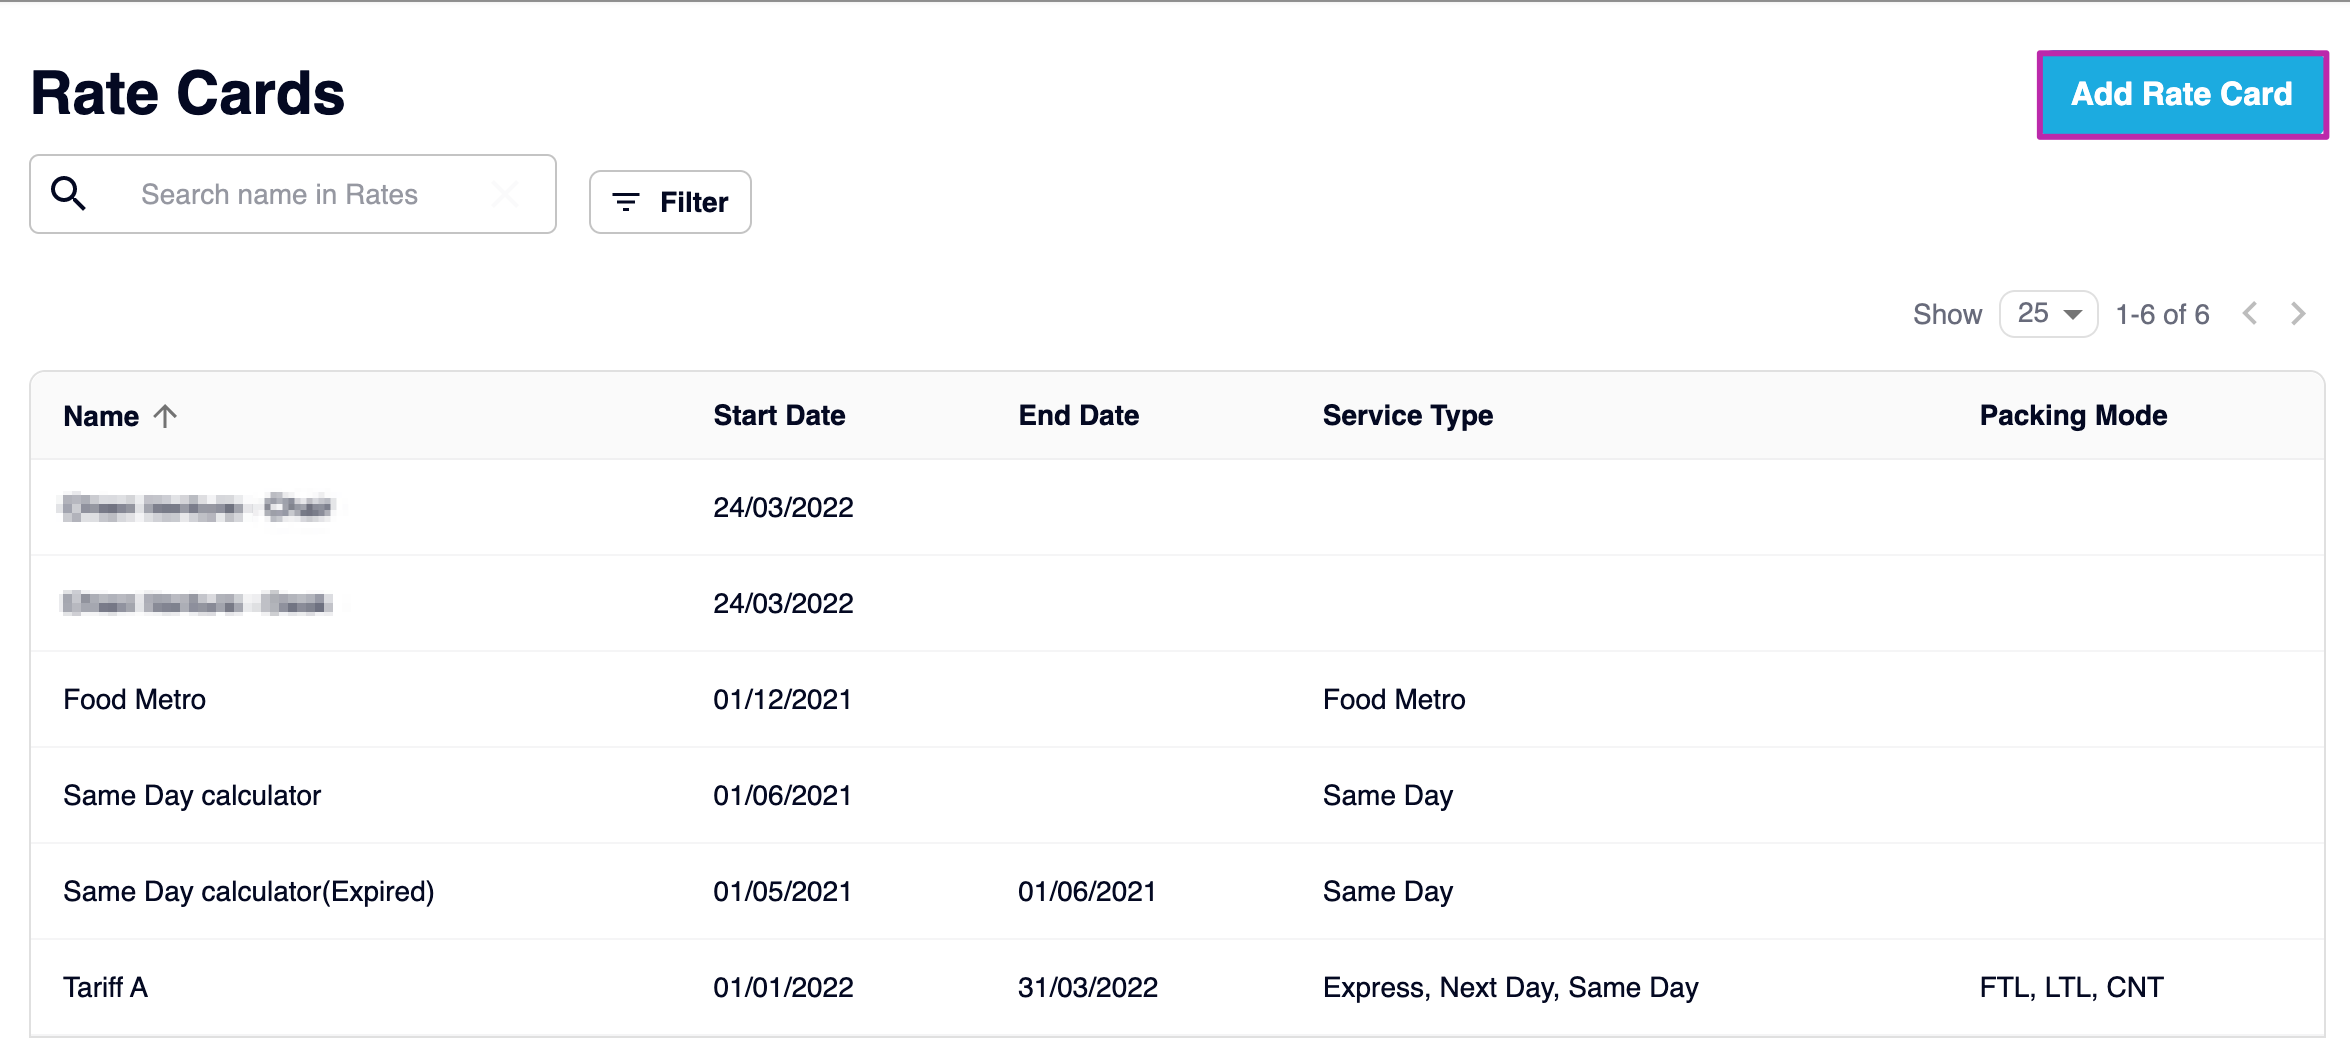
Adding a Rate Card
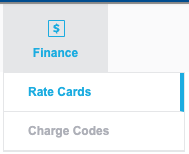
Navigate to Manage > Finance > Rate Cards.
Matching Criteria
The Matching Criteria allows you to set up a rate card that will be matched with your order.
Example: If you set up a rate card for Service Type “Same Day”, then it will only apply to orders that match that Service Type.
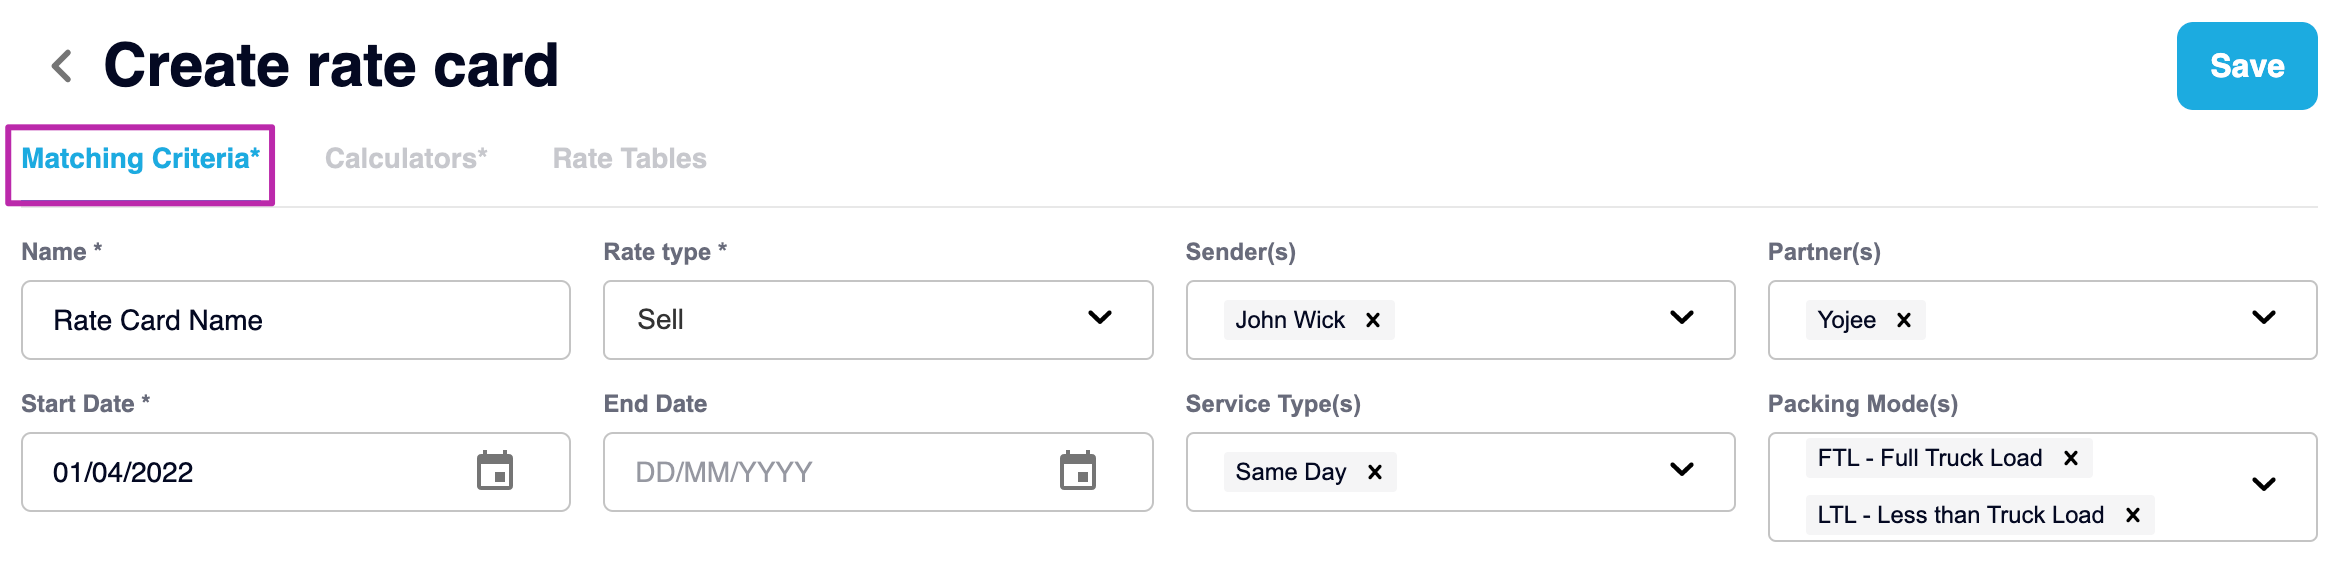
Description of Fields
-
Name
The Name of the Rate Card -
Rate type
-
Buy - From your Partners
-
Sell - To your Customers
-
All - Both Buy and Sell
-
-
Sender(s)
The Senders to which the rate card applies -
Partner(s)
The Partners to which the rate card applies -
Start Date
The date the rate card is set to activate -
End Date
The date the rate card will no longer apply -
Service Type(s)
The Service Type for which the rate will apply -
Packing Mode(s)
The Packing Mode for which the rate will apply
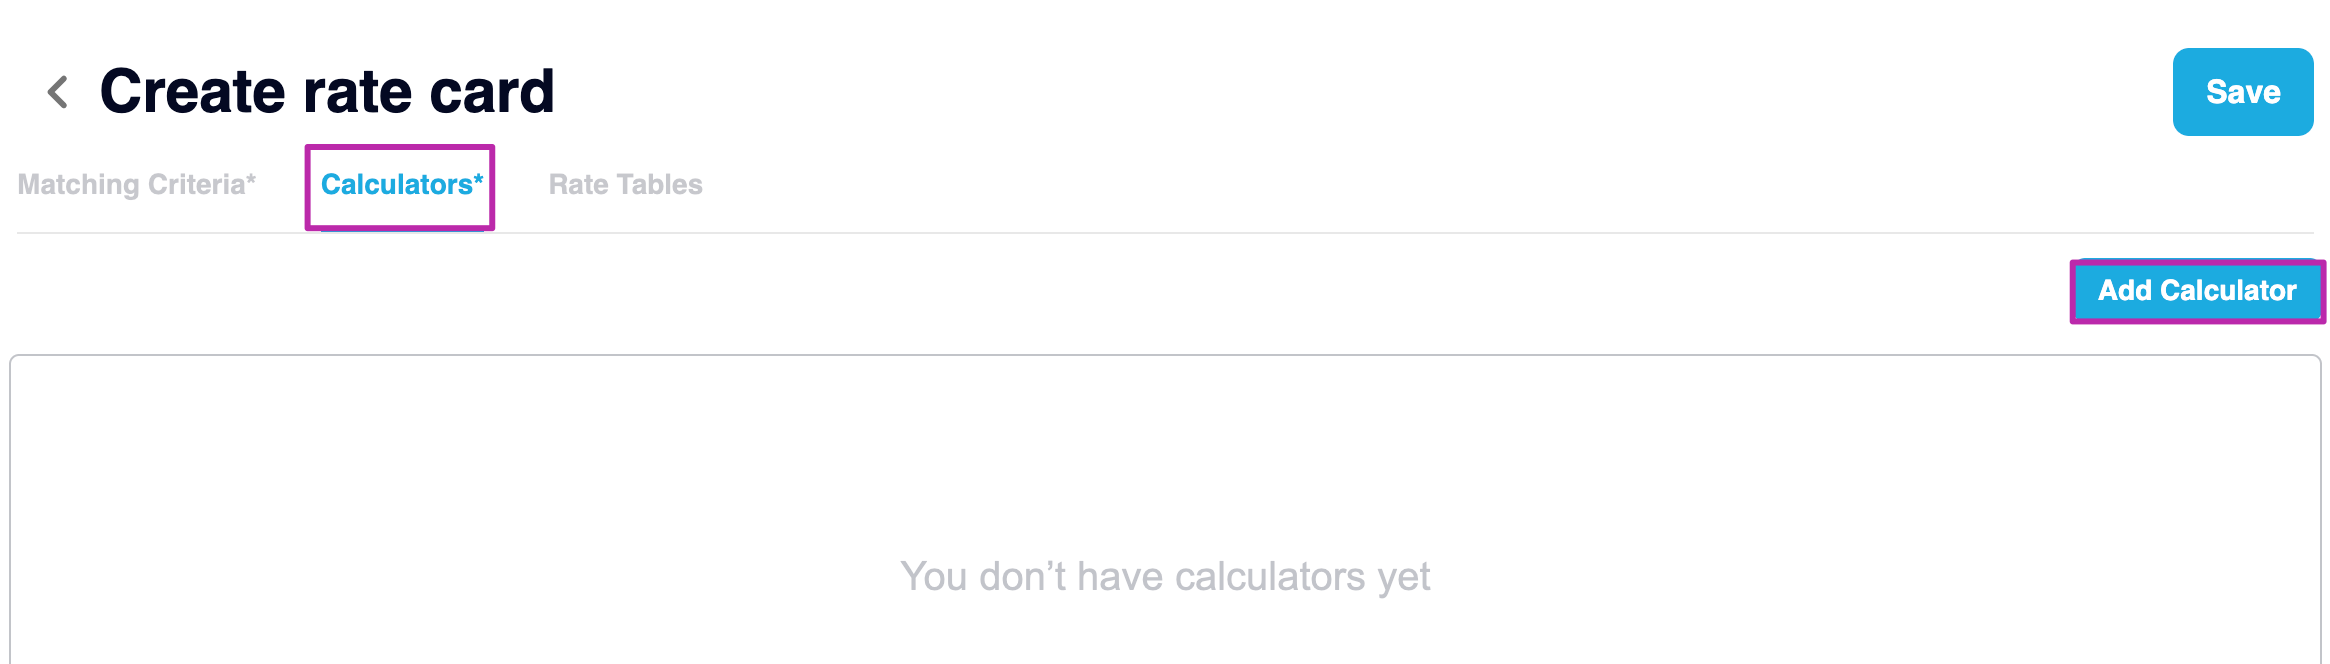
Calculators
In the second tab, next to Matching Criteria, you can select “Calculators”. Here you can set up the calculators that will make up the rates on the rate card.
Click on Add Calculators
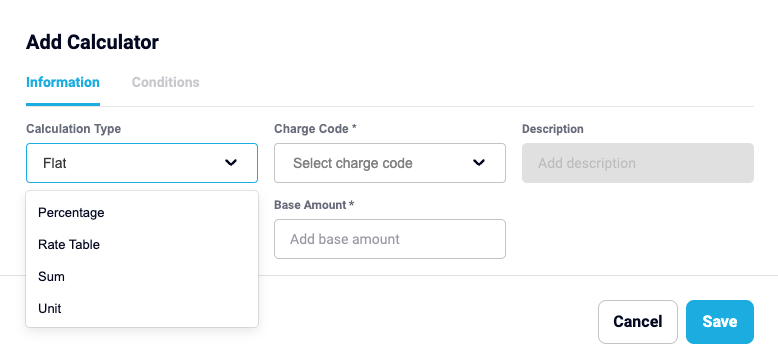
Calculation Types
We have 5 calculation types to choose from:
- Flat
- Percentage
- Sum
- Unit
- Rate Table
Flat Fee Calculator:
Flat fee calculator is a basic calculator to charge a single flat fee.
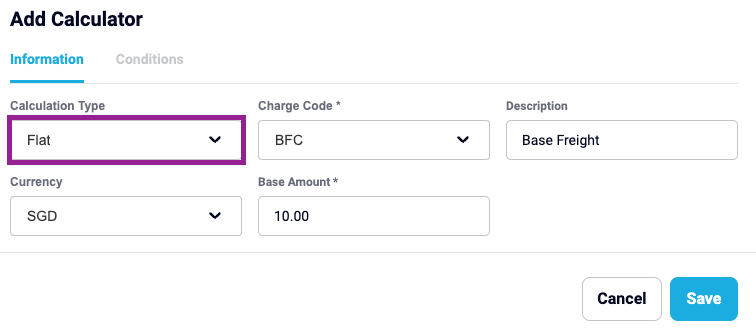
Related field descriptions for the Flat calculation type;
-
Charge code: dropdown - mandatory field
-
Description: free text - optional field
-
Value field “Base amount”: decimal number - mandatory field
-
Currency: dropdown - mandatory field
Example: If you set up a Flat calculation with the “Base amount” = 10SGD then in all orders, 10SGD will be charged regardless of any other parameters (ignoring weight, distance, quantity etc…)
Percentage
A percentage is often used for calculating Fuel Surcharges or Goods and Service Tax (GST). The user can add multiple percentage rates based on several charge types.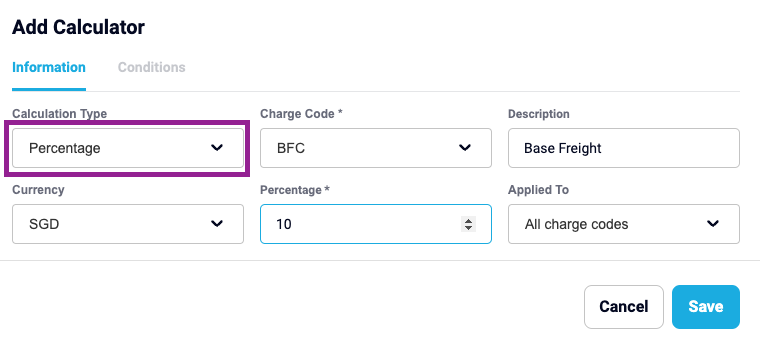
Related field descriptions for the Percentage calculation type;
-
Charge Code: dropdown - mandatory field
-
Description: free text - optional field
-
Relative To: dropdown - mandatory field:
-
This is the charge type where the calculation will based on.
-
-
Percentage* - the value used for the percentage
Sum Calculator
Sometimes the sum is greater than its parts. So, that’s why we offer a way to combine multiple calculators together.
Unit Calculator
The Unit Calculator is used to calculate a rate per unit. The unit is any type of item type you have set up.
Related field descriptions for the Unit calculation type;
-
Charge code: dropdown - mandatory field
-
Description: free text - optional field
-
Currency: dropdown - mandatory field
-
Unit type: dropdown - mandatory field
-
Unit: dropdown - mandatory or optional base on “Unit type” selection
-
Unit price: number field - mandatory field
- Minimum Charge: number field - optional minimum amount applied to all orders
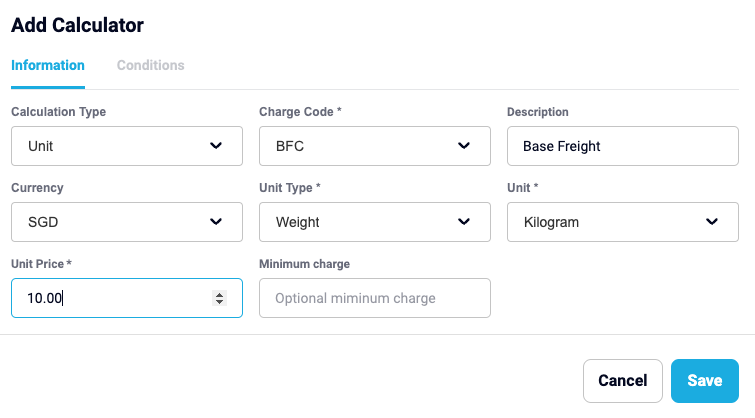
Example: If you want to charge $10 per kg for each item you would need to specify the following:
- Calculation Type = Unit
- Unit Type = Weight
- Unit = Kilogram
- Unit Price = 10.00
Rate table
Rate table is the most commonly used calculator in transportation. A set of breakpoints (or charge breaks like weight breaks, piece breaks etc) can be defined for a specific Unit Type
-
Charge Code: dropdown - mandatory field
-
Description: free text - optional field
- Minimum Charge: number field - optional minimum amount applied to all orders
Remember a Unit Type can be any of the following:
- Weight
- Distance
- Duration
- Max Dimension
- Max Height
- Max Length
- Max Width
- Max Quantity
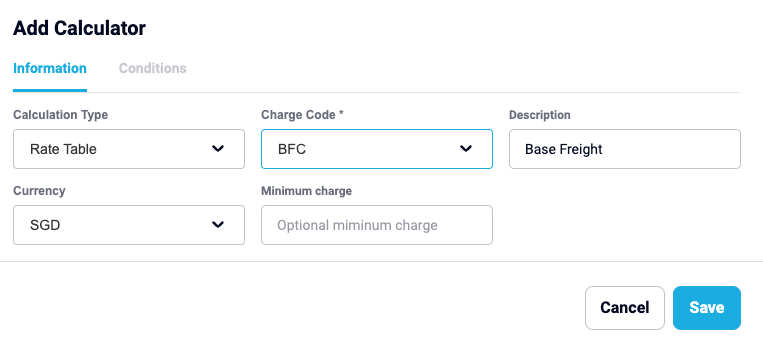
Rate Table Interface
Once you have selected the Rate Table calculation type in the previous step, you will be directed to the rate table interface. This is where you will set your criteria for your custom rate table
- Choose Calculator
This should be chosen by default as per the previous step. But you can have multiple Rate Table calculators under one rate card. You can select those here - Table Name
Type the name of your table. This is a free text field. - Create Table

- Multiplier with
Allows you to choose how the rate table is multiplied by, whether it is Quantity , Distance, Duration, Volume, Weight or None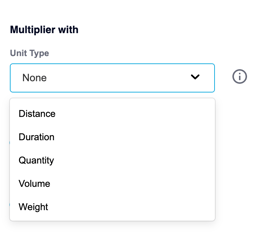
- Vertical Dimension: maximum 2 dimensions added
- Horizontal dimension: maximum 2 dimensions added
What are dimensions? 🔍
Dimensions are also another name for the rows and columns of a table like when using an Excel or Google Sheet
Eg. A Vertical Dimension is the same as a column and a Horizontal Dimension makes reference to the rows 🙌
Dimension fields
-
-
Name
Free text field, allows you to customise the name of your table's row & column headers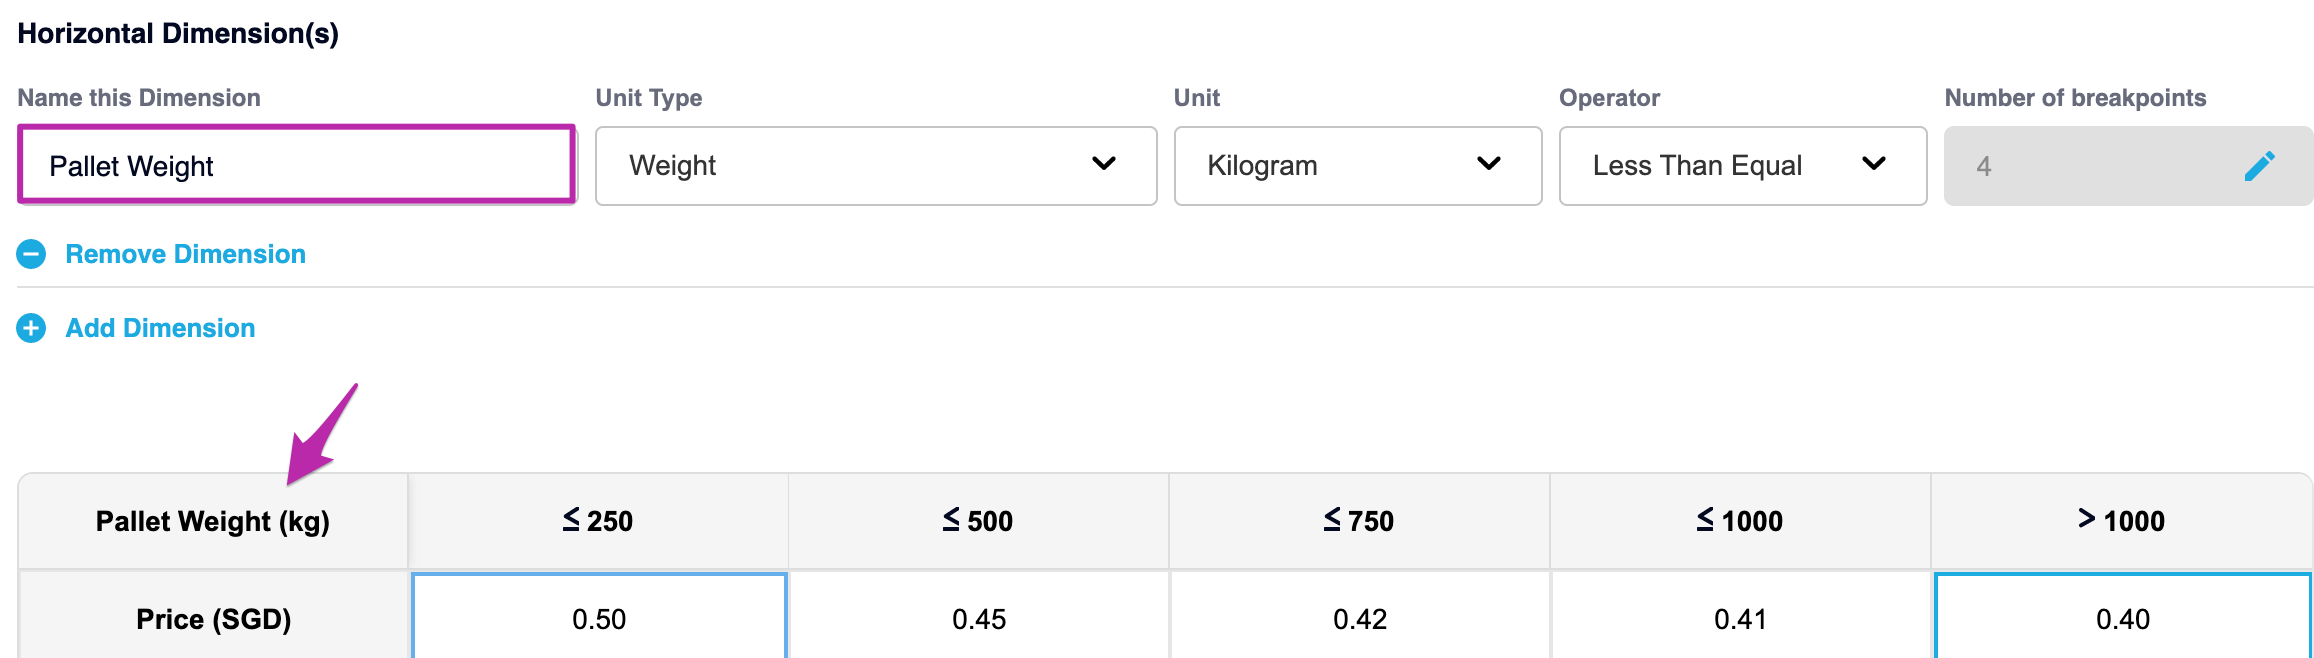
-
Unit type
Dropdown field, e.g: weight, distance, quantity, duration…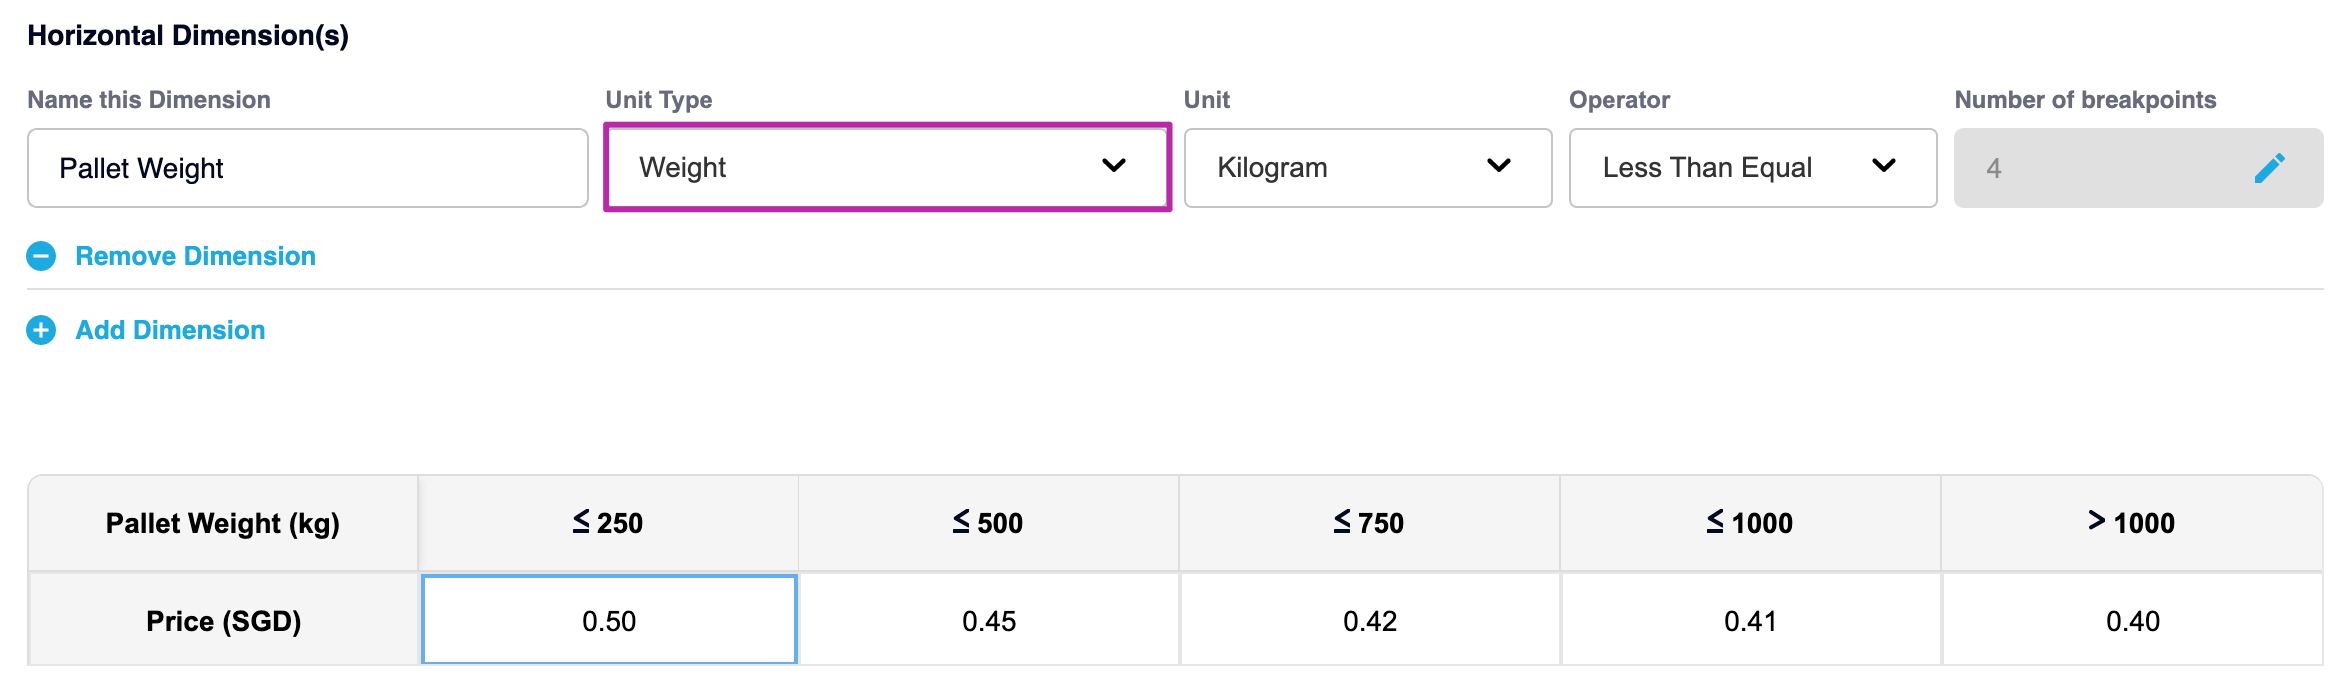
-
Unit
Dropdown field, based on the Unit type selection above. Eg: if “unit type” = weight then “unit” should be a ton, kilogram, gram, ounce, pound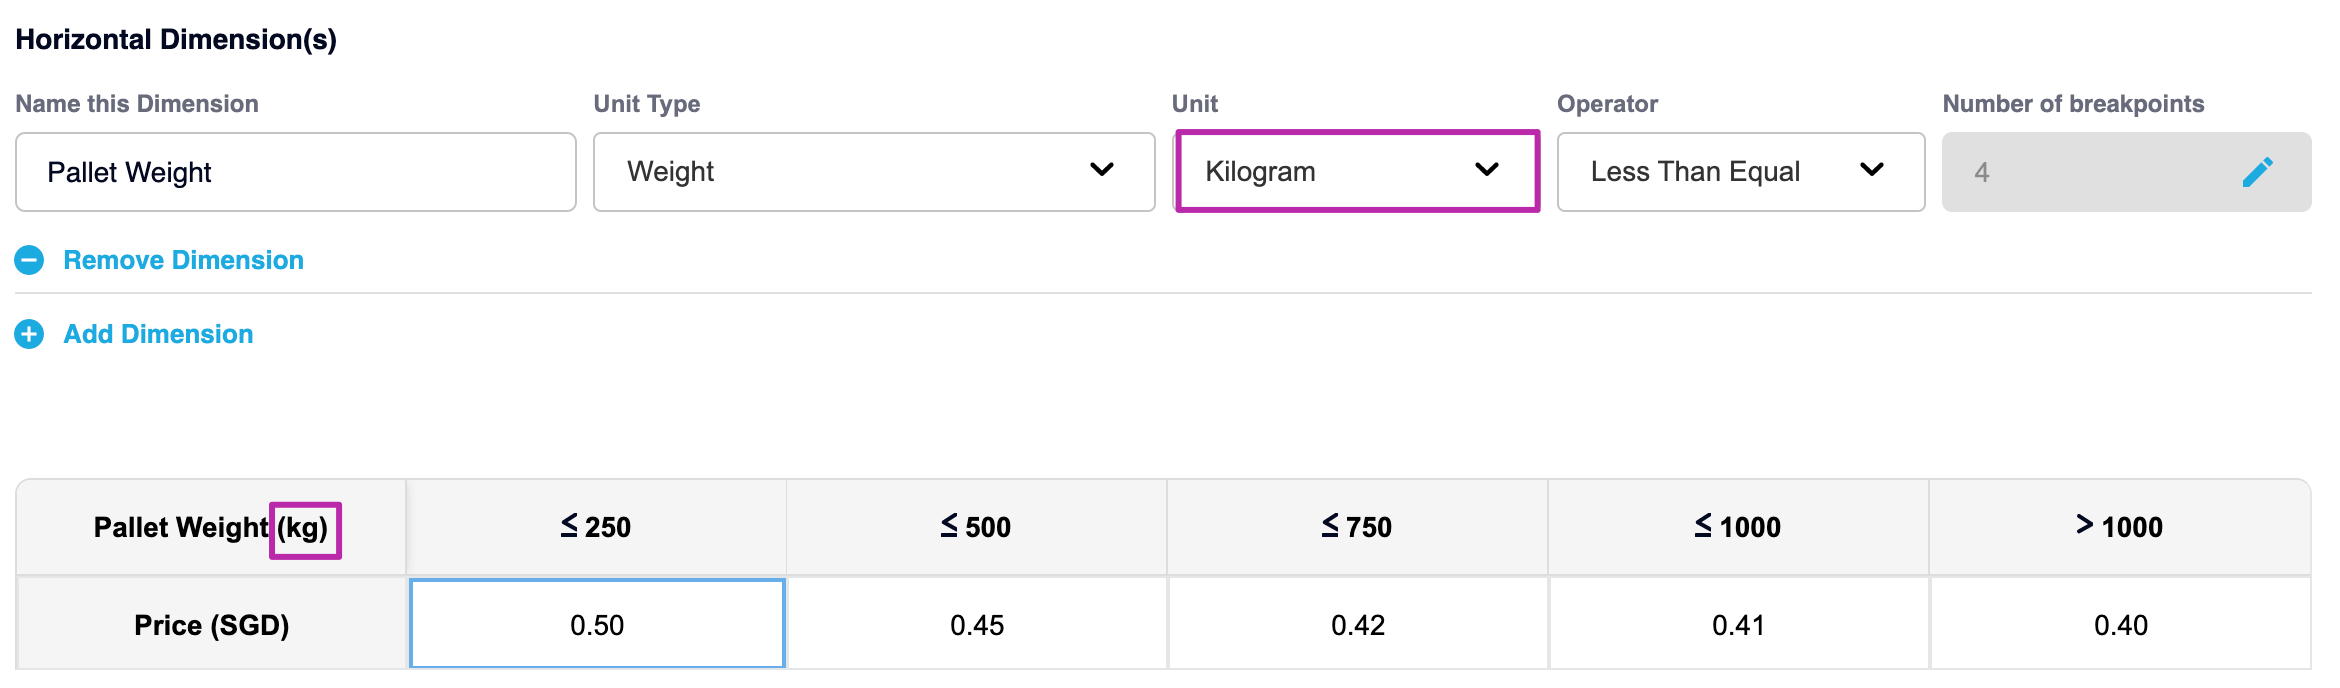
-
Operator
Dropdown field as less than equal, equal or greater than equal
-

≤ Less Than or Equal to
≥ Greater Than or Equal to
= Equal
-
-
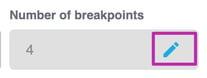
Number of breakpoints:
-
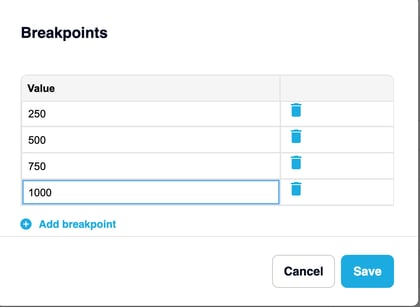
Click on the pencil to create or build your break points
- Enter the break point values here and continue adding breakpoints until you have the values required
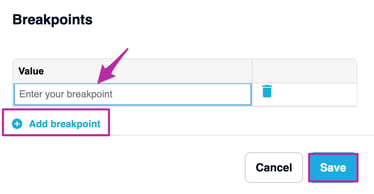
- Below shows the break points - 0-250kgs, 251-500kgs, 501-750kgs, 751-1000kgs, select SAVE
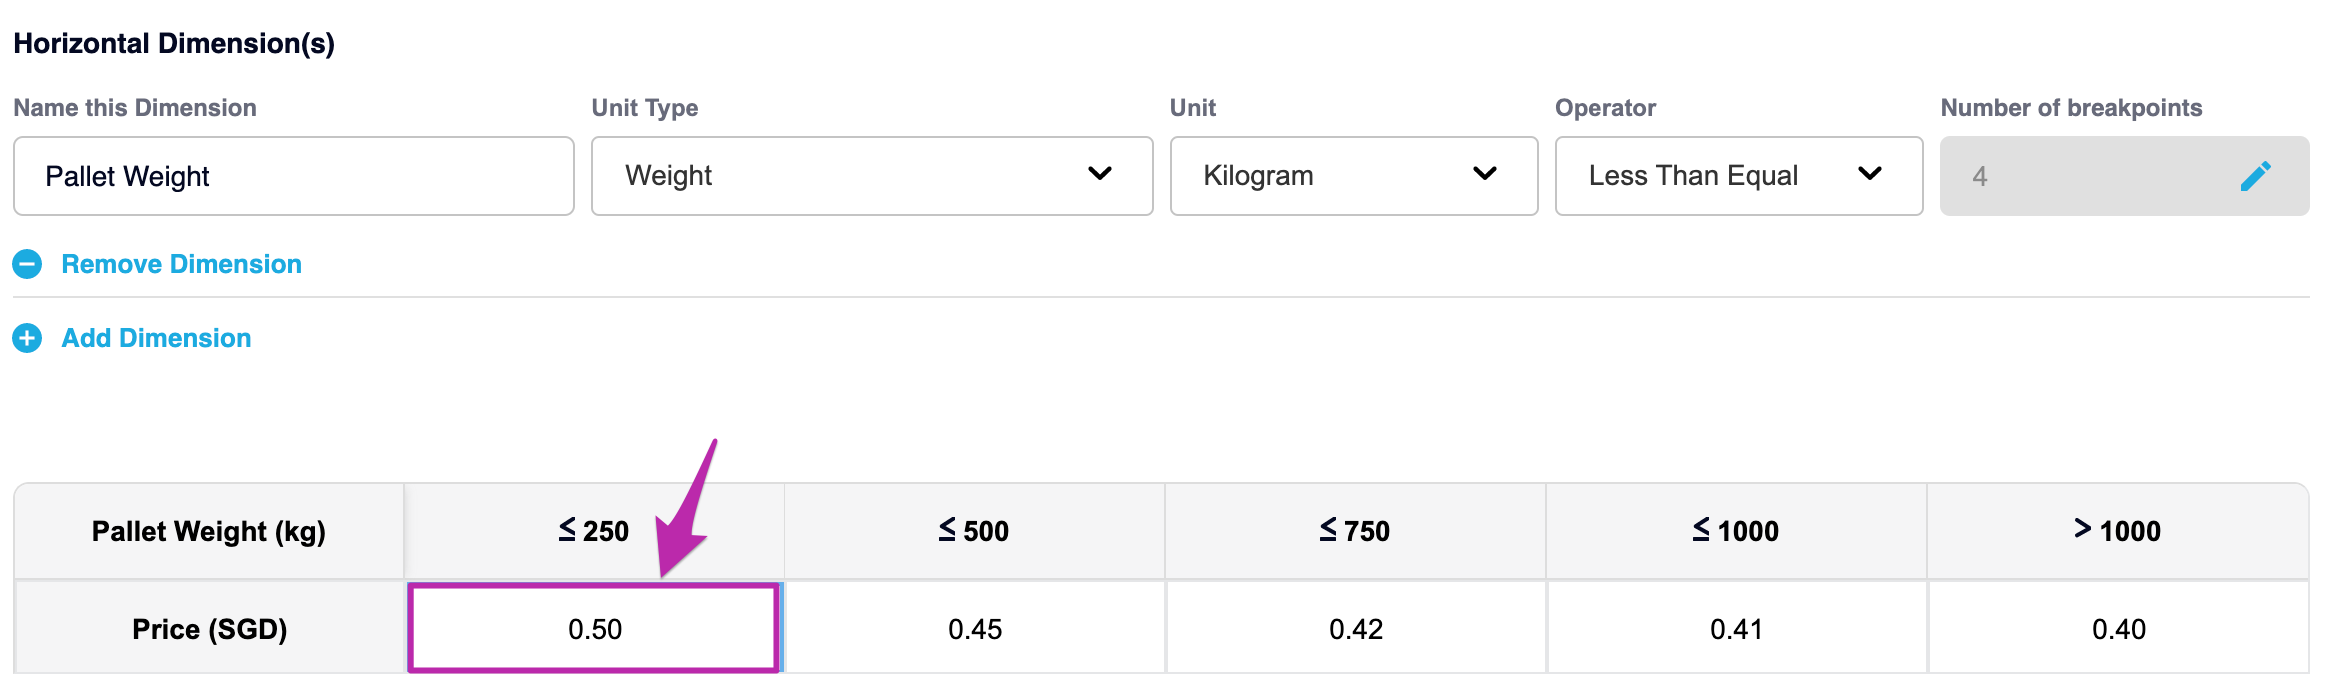
- Next, type your dollar amount next in the table according to your breaks eg:
-
-
❗ Don't forget to Save your Rate Card❗
Once you have finished configuring your rate table, scroll up and click SAVE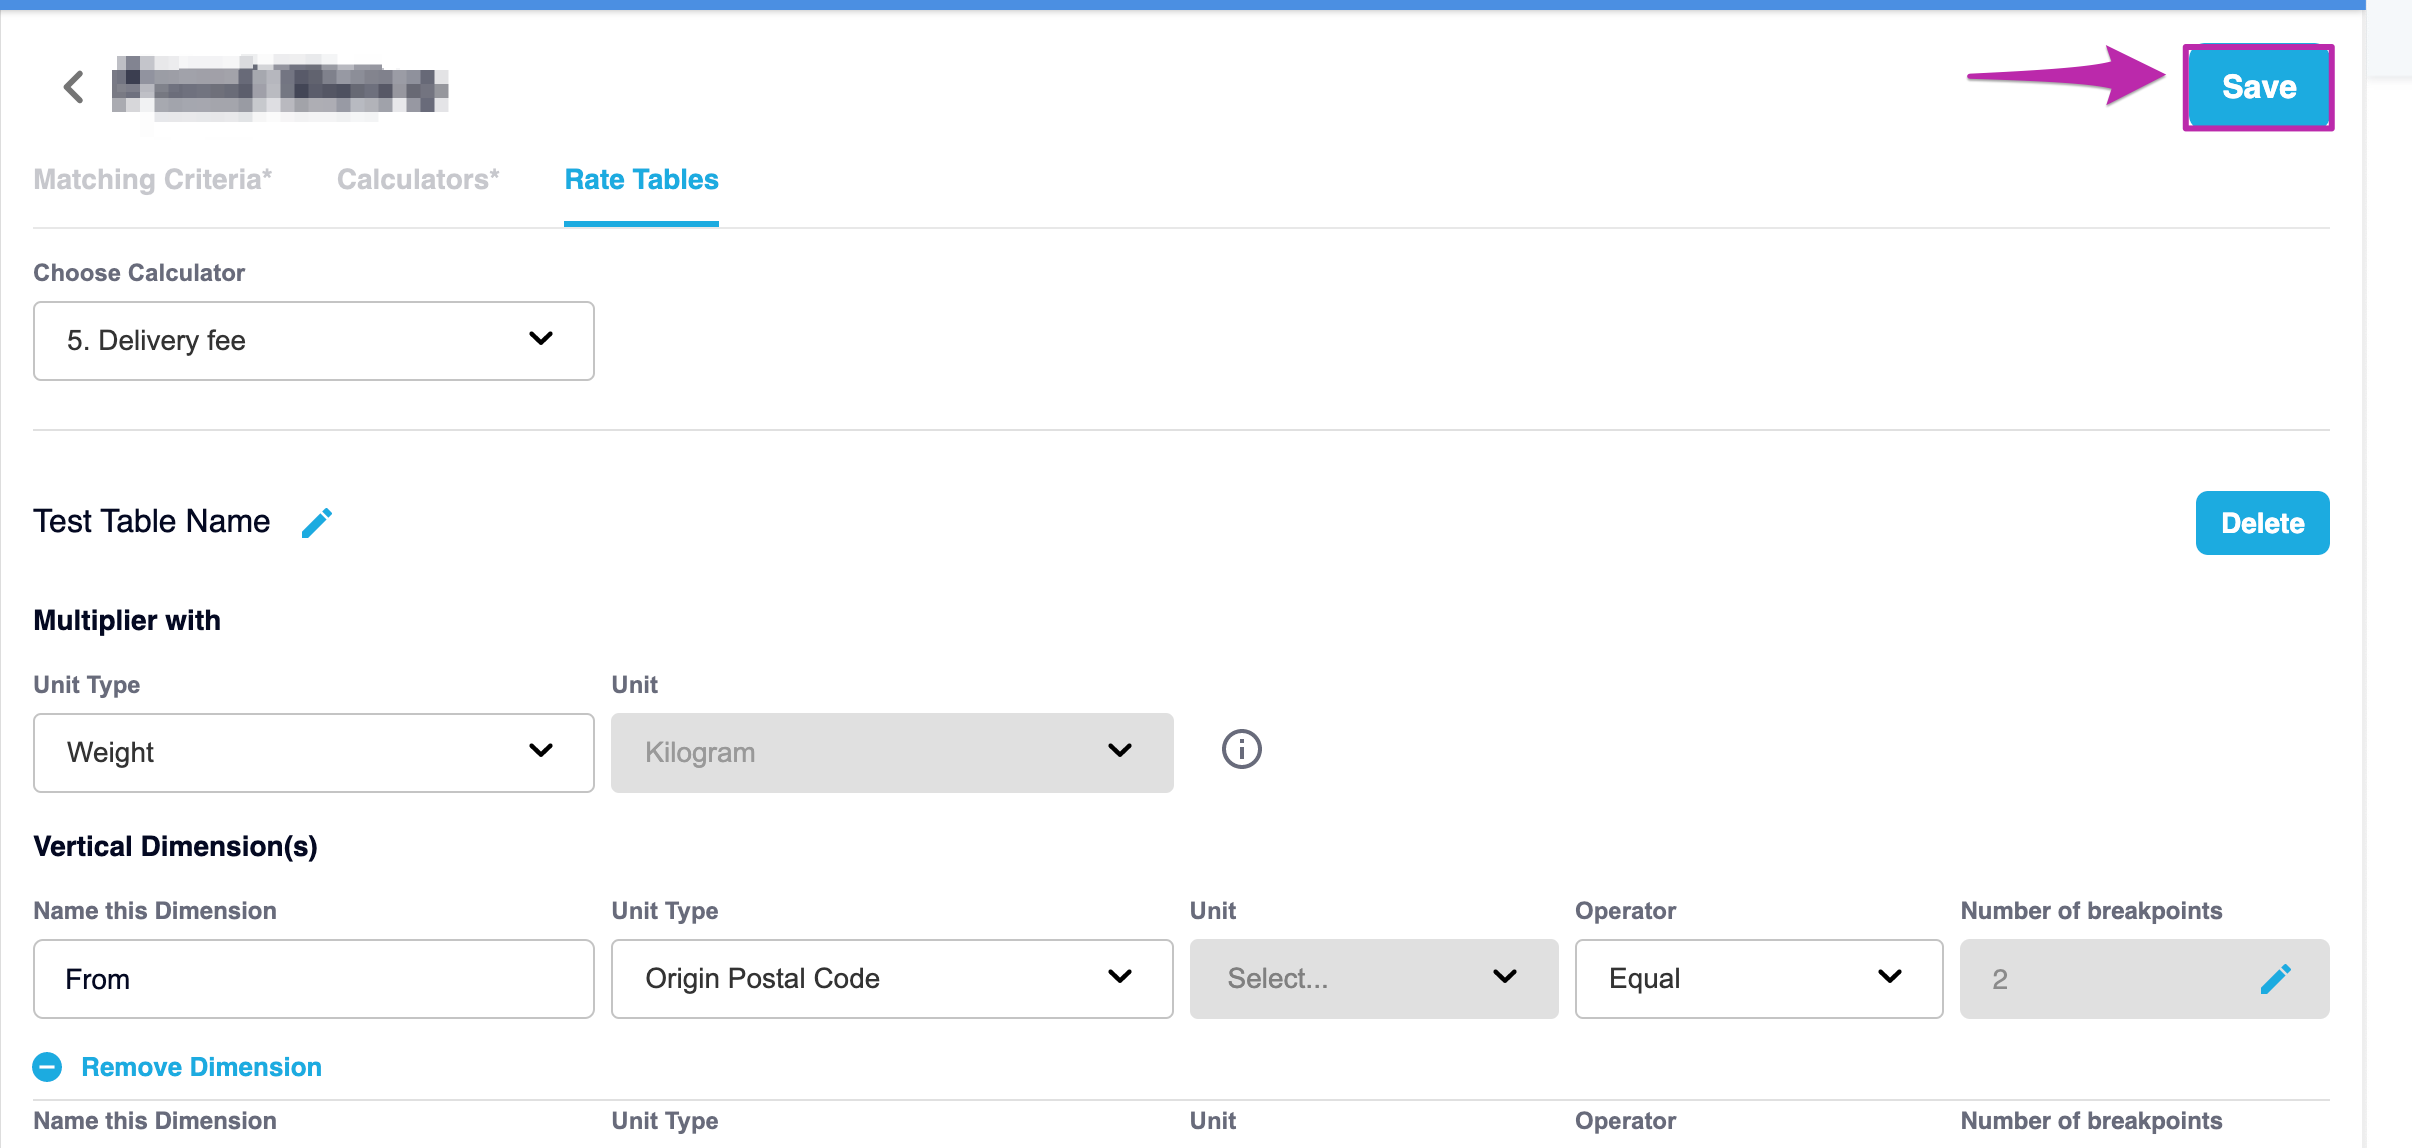
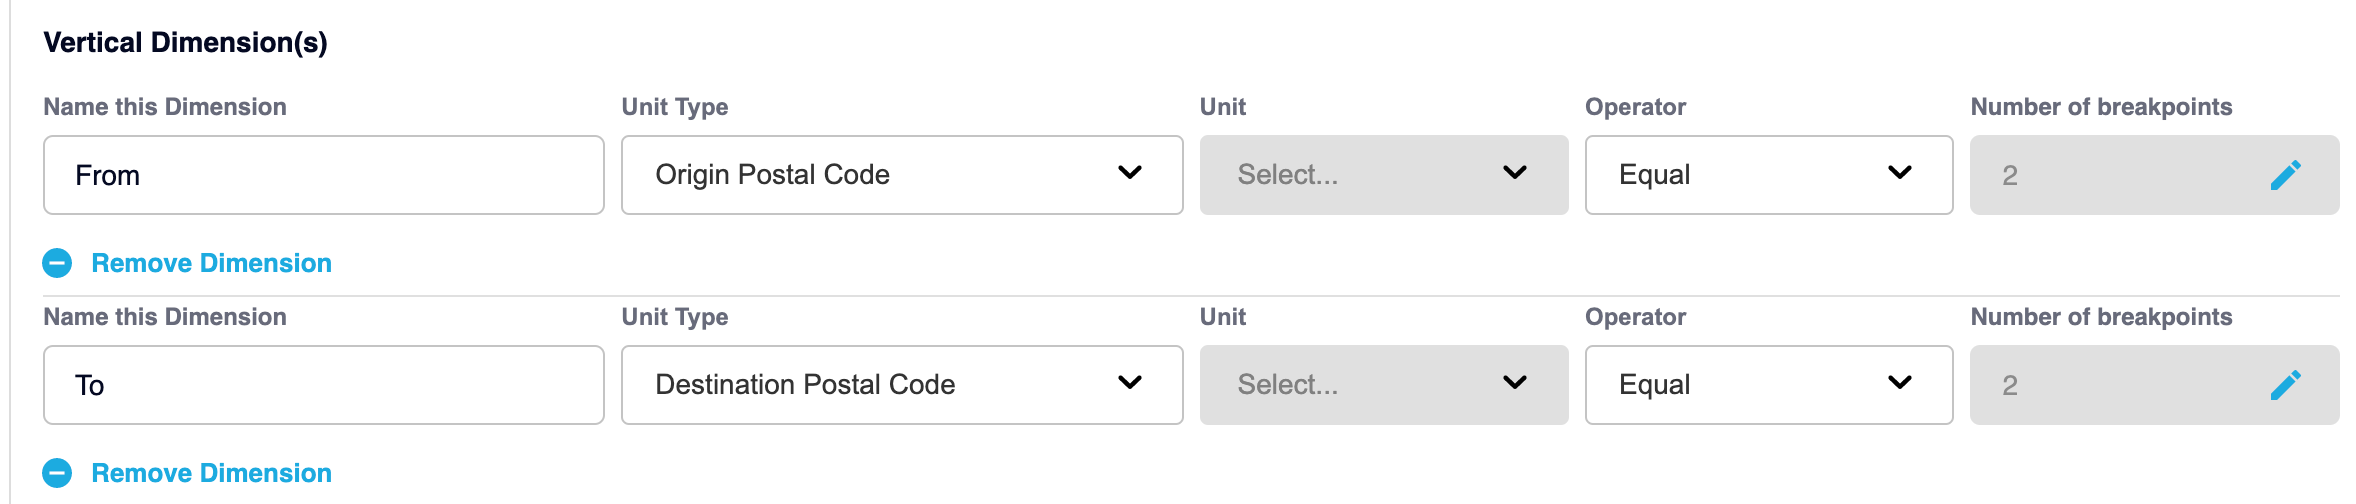
Example of a Vertical Dimension using the Origin and Destination Postal Codes, naming the dimensions as From and To:
From breakpoints

To breakpoints
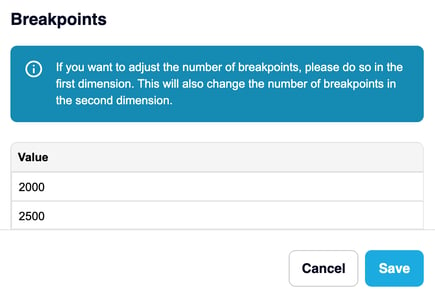
Combined Vertical and Horizontal Dimensions to create a rate table for calculating the price for an item from postal code 3000 to 2000 and/or 2500 with the weight breaks 0-250kgs, 251-500kgs, 501-750kgs, 751-1000kgs, 1000kgs+

NOTE 👍
-
If the “operator” is either “less than equal” or “greater than equal”, then the actual columns/rows added in the table will have 1 extra break point displayed in the table, refer above for the value greater than 1000kgs. We created 4 breaks but it automatically takes into account the possibility of anything greater than 1000kgs
-
If the“operator” is “equal” then the actual columns/rows added in the table will equal the number of breakpoints.
-
In a vertical dimension (column), if the “operator” is “less than equal” and the number of breakpoints is 3, then the total columns in the table for Vertical will display an extra break, so this would show as 4.
Rate Table Logic
-
Each rate table is only possible to save if having at least 1 dimension
-
The maximum number of dimensions for each Rate table is 4 (2 for Vertical and 2 for Horizontal)
-
The second dimension in each way of Vertical or Horizontal must have the same number of breakpoints as the first dimension. That means the user can not add/remove the number of breakpoints from the second dimension.
-
In the scenario where, 2 dimensions have the same Vertical or Horizontal dimension with 2 different charges, then the greater value will be taken .
Use Cases
Scenario 1
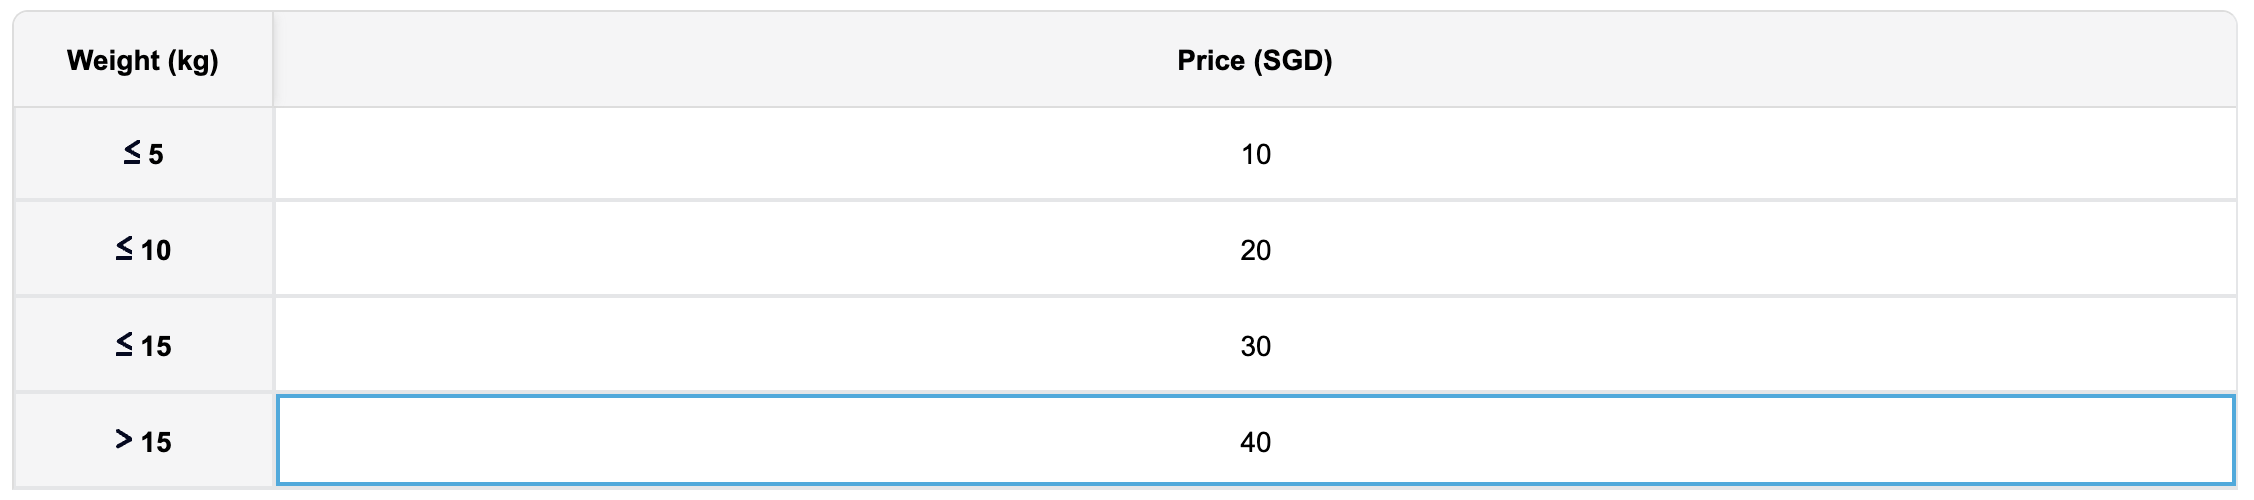
Rate table is set up with 1 dimension as:
-
-
Unit type: Weight
-
Unit: kilogram
-
Operator: less than equal
-
Number of breakpoints: 3
-
Value for each breakpoint: 5, 10, 15
-
And fill in the charge for each breakpoint as below:
-
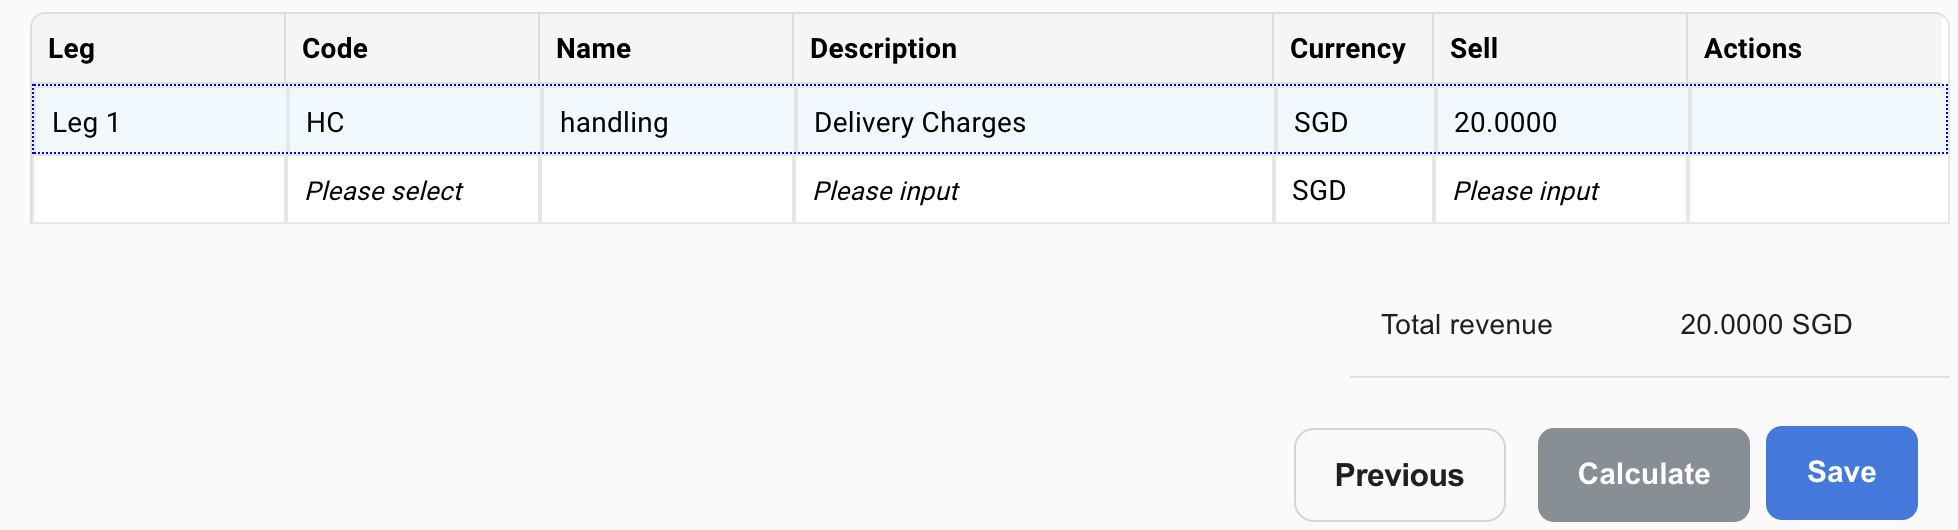
Order includes:
-
-
1 item with weight = 8kg => this will fall into less than or equal to 10kg, so the charge fee will be 20 SGD
-
Scenario 2
-
The rate table is set up with 2 dimensions as:
-
First dimension in Vertical: Unit type = Weight; Unit = kilogram; Operator: less than equal; Number of breakpoints: 3; Value for each breakpoint: 5, 10, 15
-
The second dimension is Horizontal: Unit type = Quantity; (Unit field greyed out); Operator: less than equal; Number of breakpoints: 4; Value for each breakpoint: 3, 7, 12 and 15
-
And fill in the charge for each breakpoint as below:
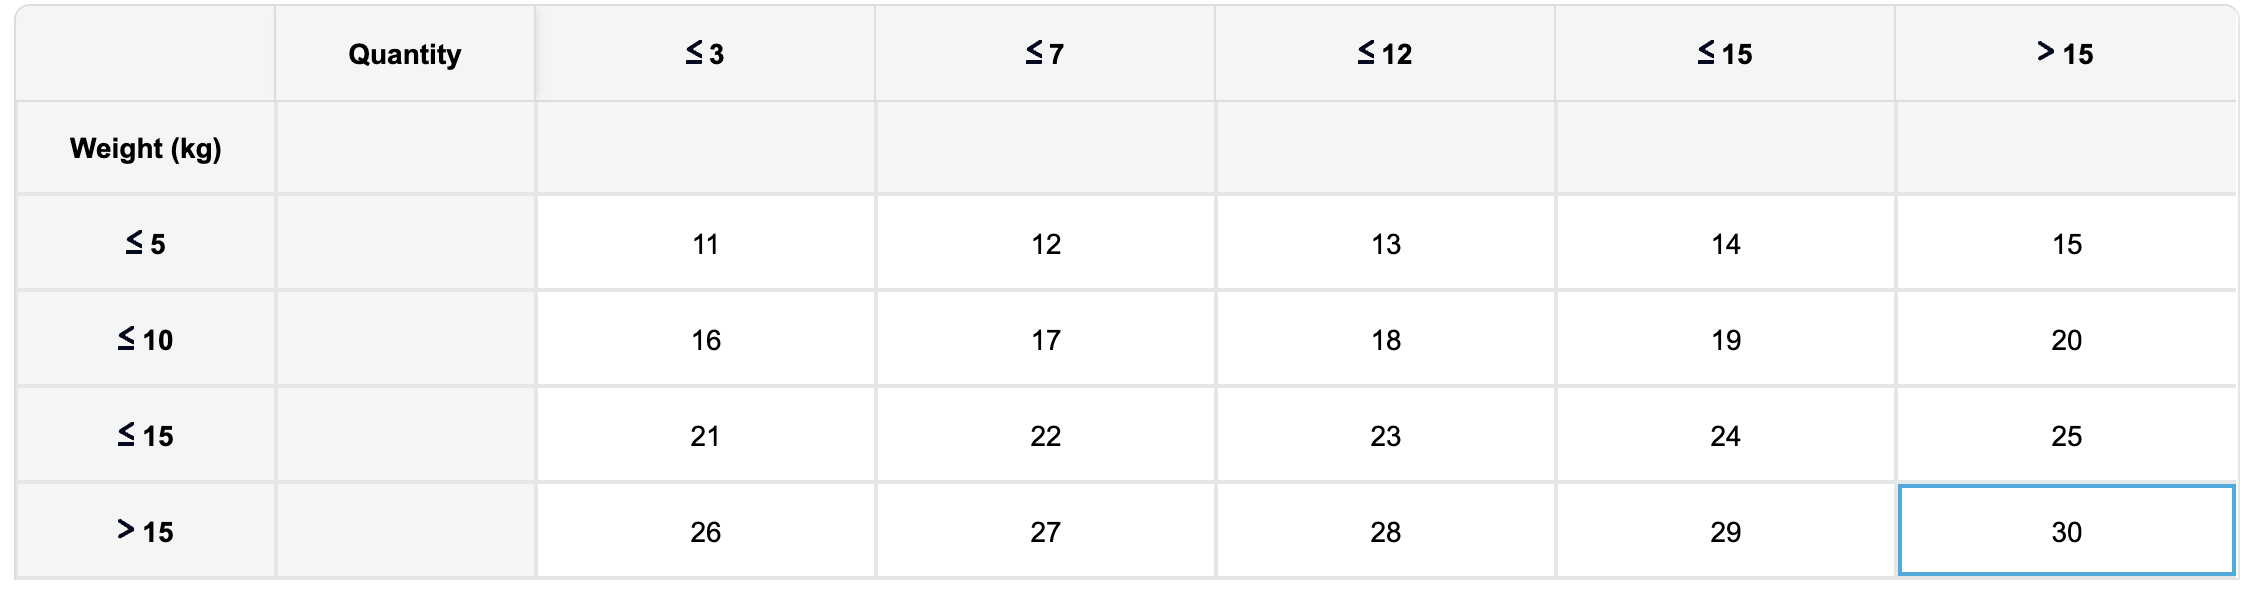
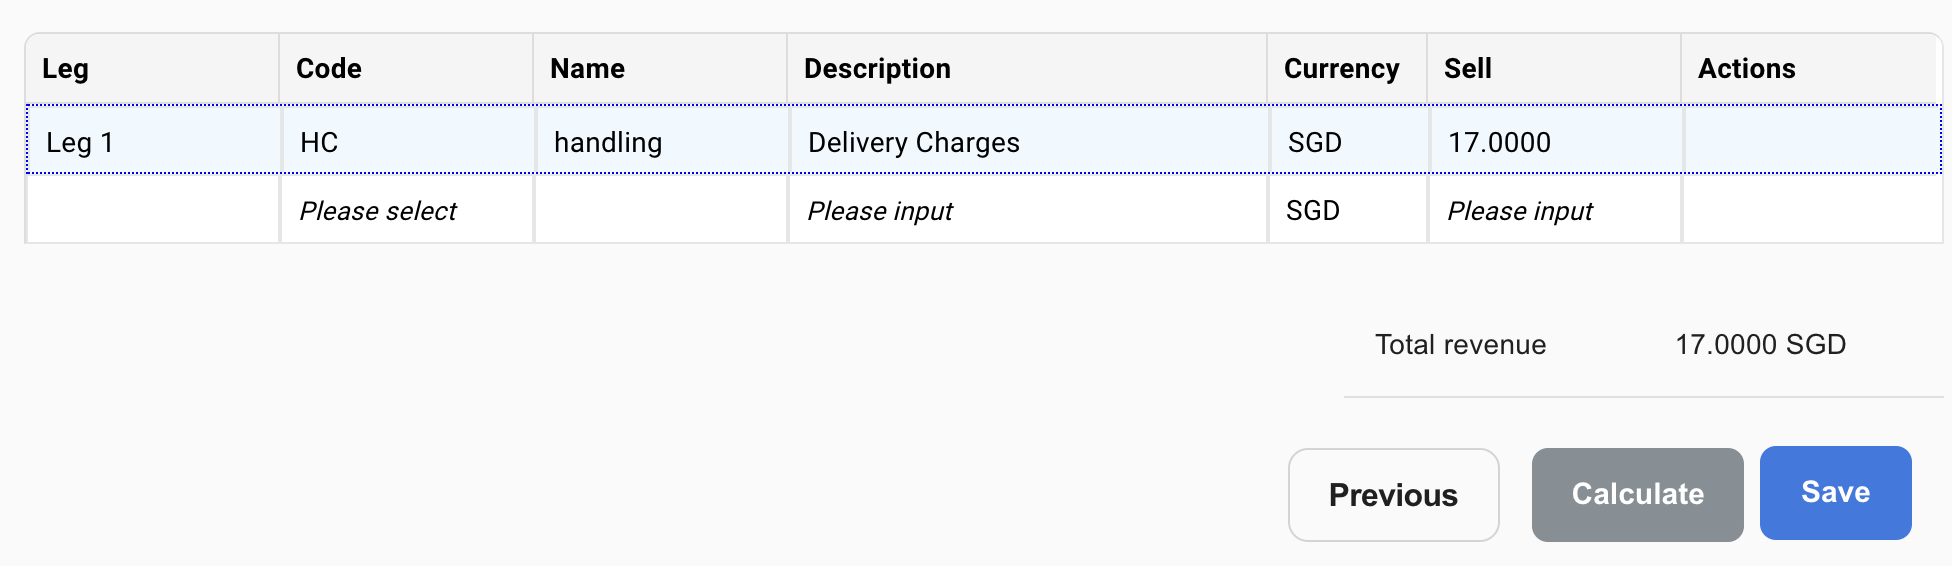
Order includes:
-
5 items
-
each item’s weight is 2 kg
-
so total order’s weight is 10 kg
-
The charge fee will be 17 SGD
-
Scenario 3
The rate table is set up with 3 dimensions:
-
First dimension in Vertical: Unit type = Weight; Unit = kilogram; Operator: less than equal; Number of breakpoints: 3; Value for each breakpoint: 5, 10, 15
-
Second dimension in Horizontal: Unit type = Distance; Unit = kilometer; Operator: less than equal; Number of breakpoints: 4 (same value as its first dimension); Value for each breakpoint: 8, 18 and 28
-
The Third dimension in Horizontal: Unit type = Quantity; (Unit field grey out); Operator: less than equal; Number of breakpoints: 4; Value for each breakpoint: 3, 7, 12 and 15
-
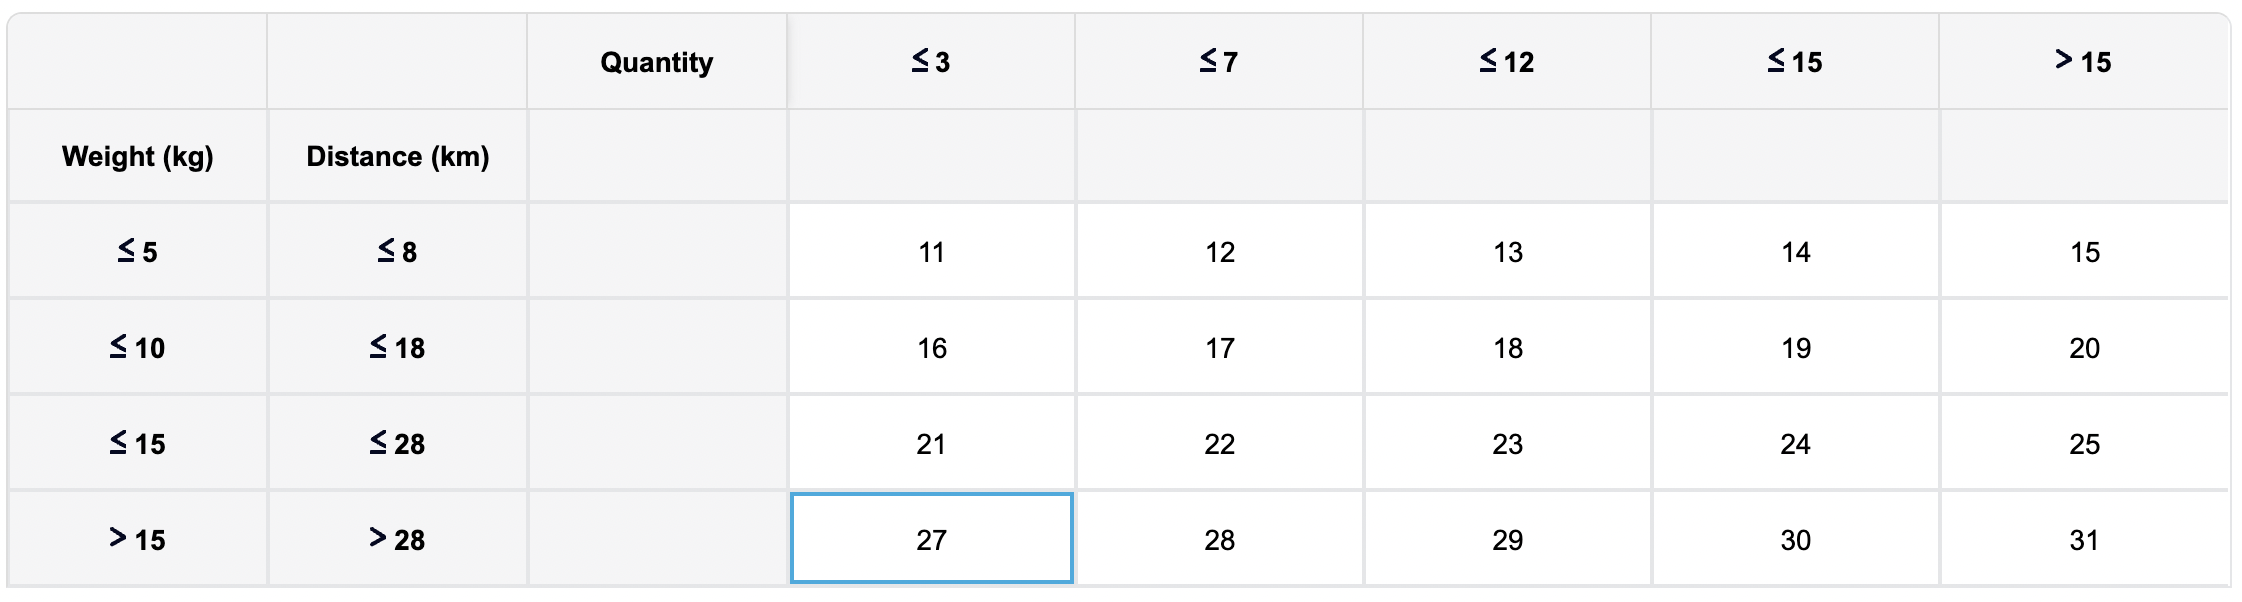
And fill in the charge for each breakpoint as below:
-
-
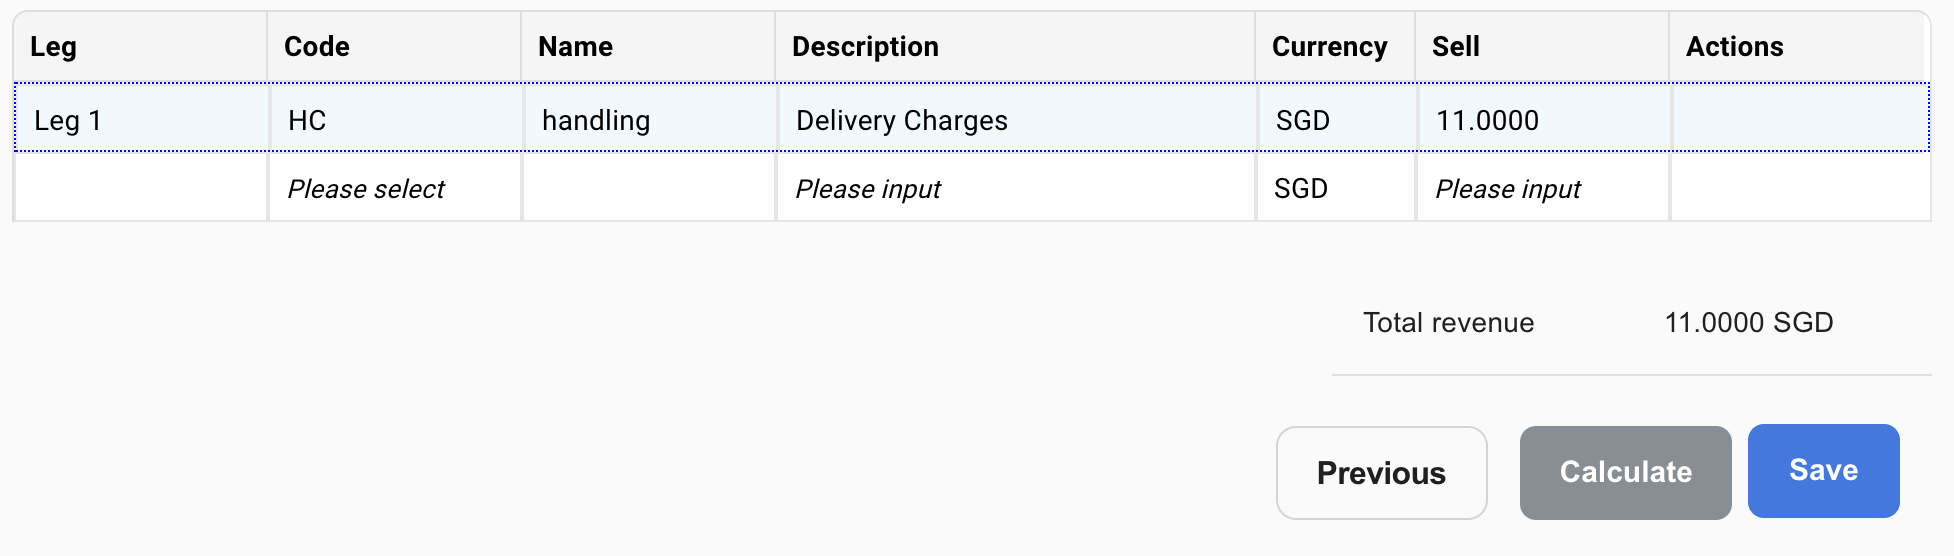
Scenario 3.1: order includes:
-
1 item weight = 5kg
-
Distance = 4.8km
-
The charge fee will be 11 SGD
-
-
Scenario 3.2: order includes:
-
4 items
-
Total weight of order = 8kg => charge should be 17 SGD
-
Distance = 37km => charge should be 28 SGD
-
In this case, the greater will be used so the charge fee will be 28 SGD (
-

Scenario 4
Rate table is set up with 1 dimension as:
-
Unit type: Origin Postal Code
-
(Unit: grey out)
-
Operator: equal
-
Number of breakpoints: 4
-
Value for each breakpoint: 01*, 02*, 30* and *
-
And fill in the charge for each breakpoint as below:
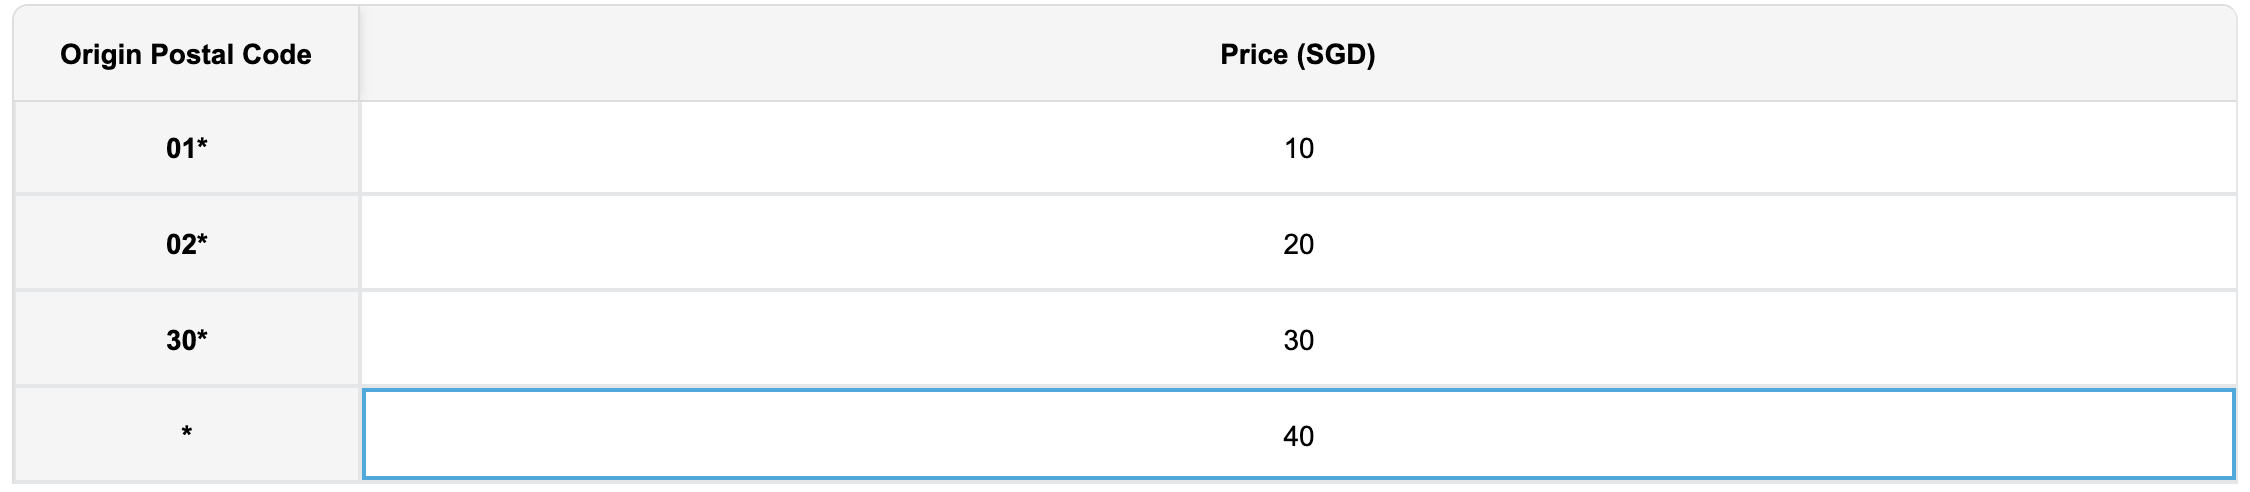
TIP 👏
Using an asterisk * to start or end a post code allows you to use all the numbers in that postcode without having to enter them individually!
-
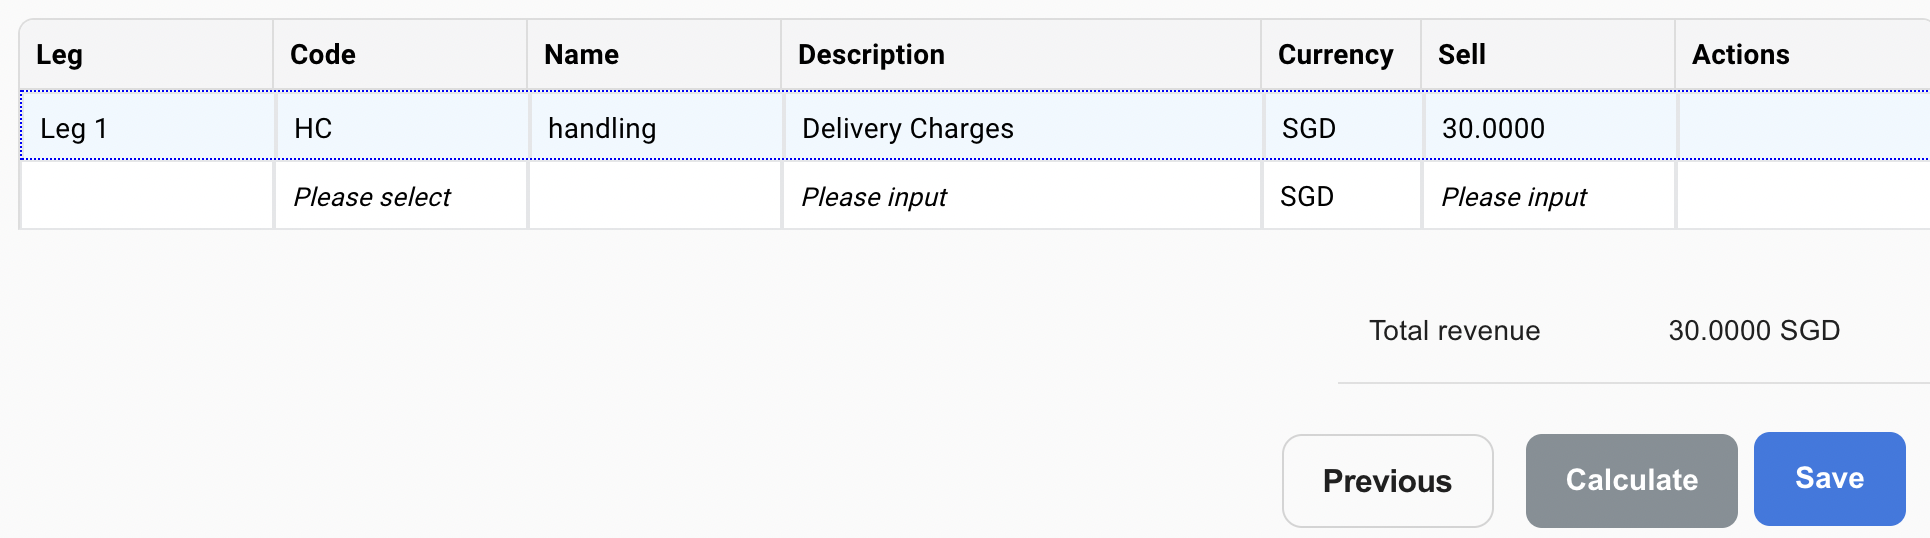
Scenario 4.1: Order includes:
-
1 item with origin postal code as 308215
-
The charge will be 30 SGD
-
-
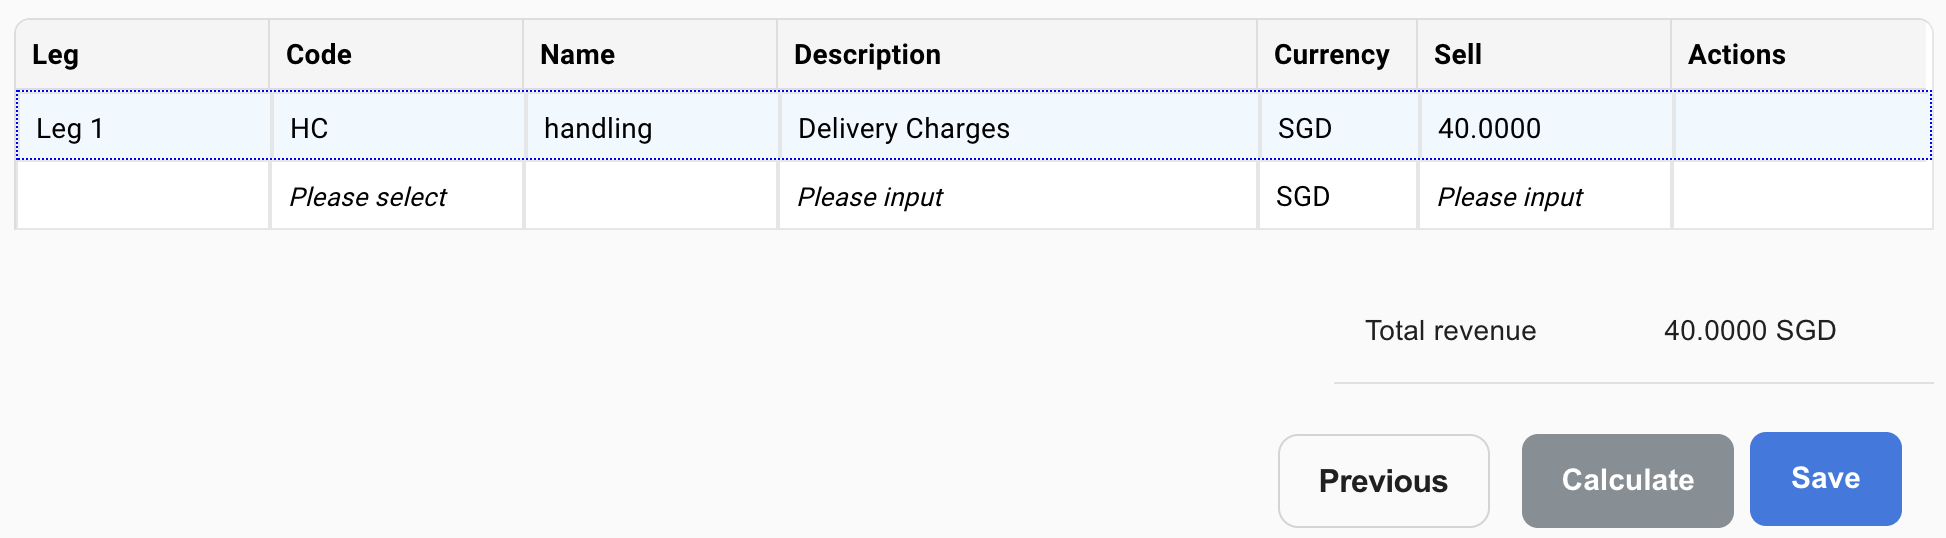
Scenario 4.2: Order includes:
-
1 item with origin postal code as 546080
-
The charge will be 40 SGD
-
Conditions
Condition are used on Calculator level to apply the calculator if the condition is met.
You can add condition in 2 ways
- Single Condition or;
- Group Condition.
You can use either one or combine them.
To add a condition to a calculator, click on the pencil to edit.

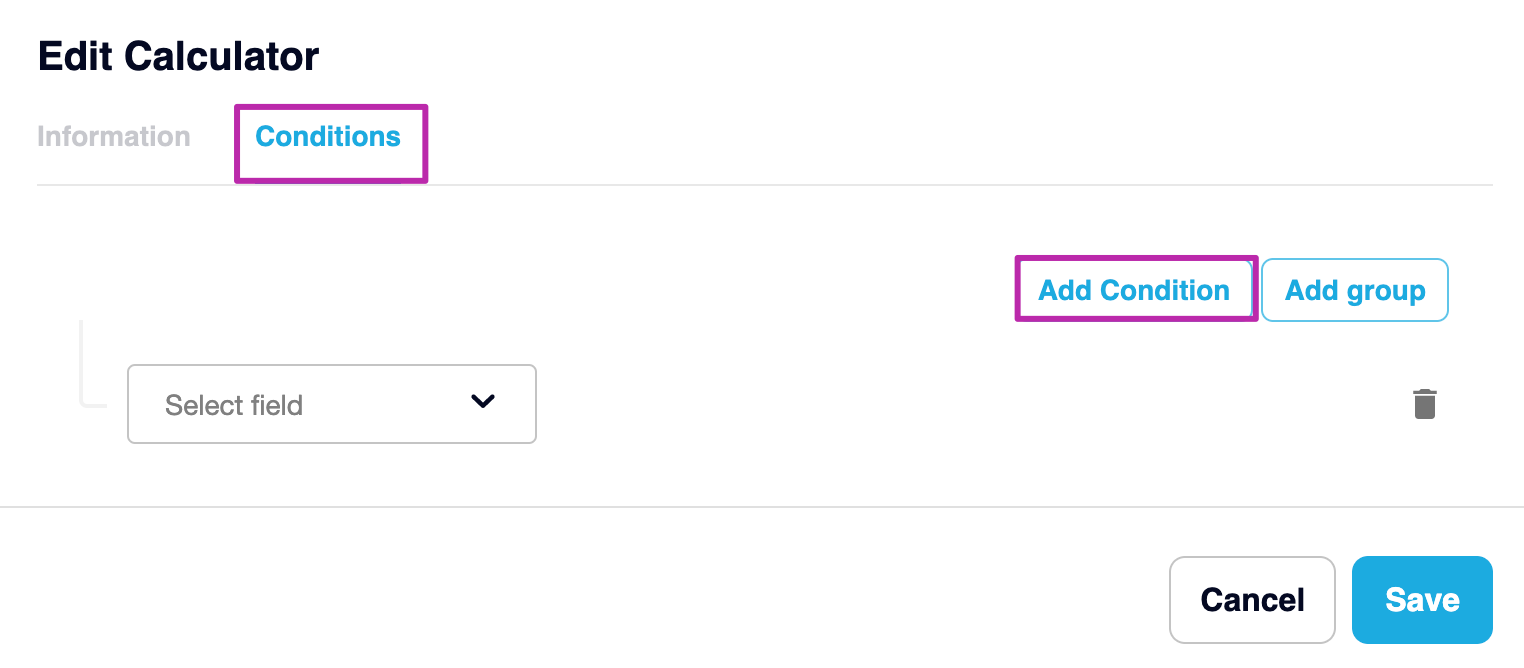
Single Condition
The single condition allows you to quickly add condition on the most common criteria:
-
Select the condition you want to apply the calculator
-
Select the operator
-
Fill in the value of the condition
-
Select Save
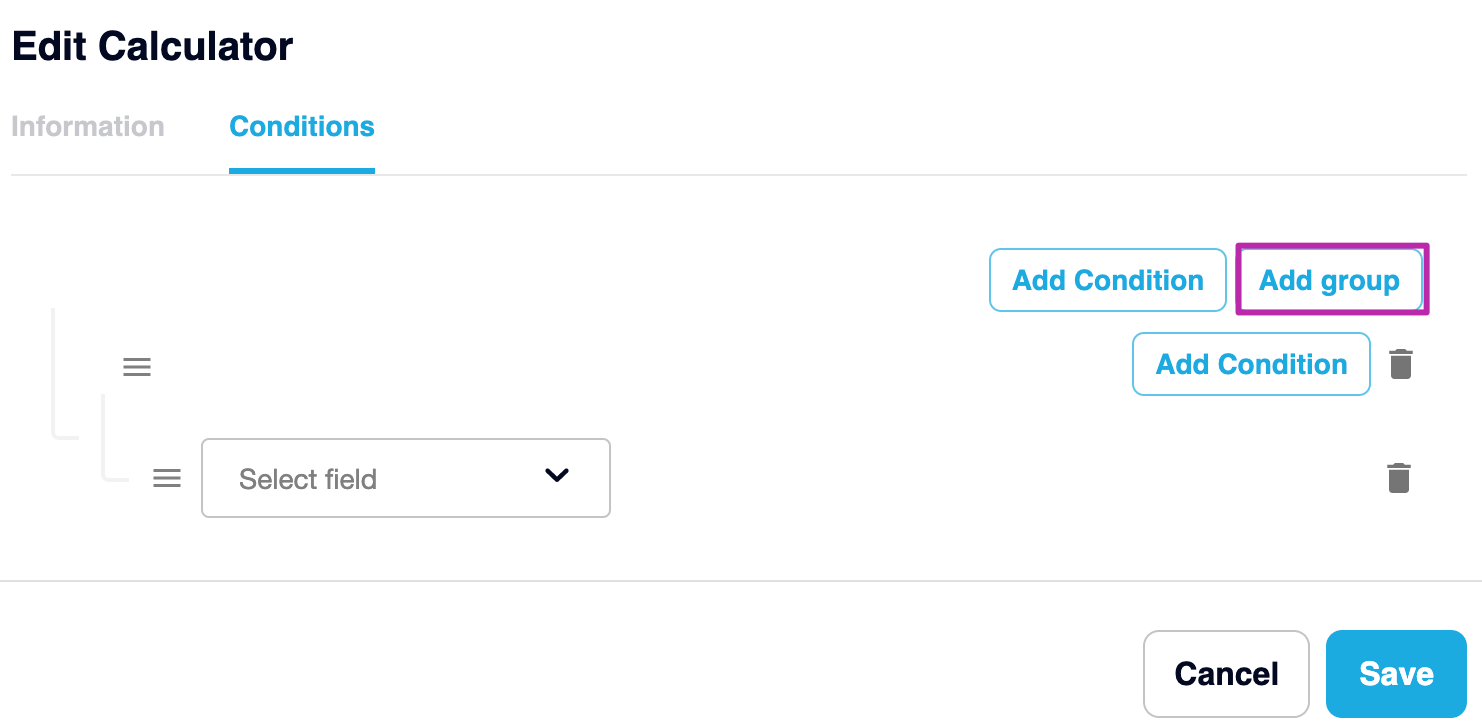
Group Condition
The group condition allows you add multiple conditions into 1 group:
-
Select Add group button
-
Select First Condition, select operator and fill in the value
-
Select Second Condition, select operator and fill in the value
-
Add more Rules following the steps above
-
Determine relationship between the Rules with “AND” or “OR”
-
Select Save