
Overview
Your customer sends jobs to you through TCMS. Your office team assigns those jobs to your drivers, and your drivers complete them in the TCMS Driver App. Proof of delivery flows back to your customer automatically.
There are two roles in this guide:
- Dispatcher (office): logs in to the TCMS Dispatcher website, sets up drivers, and assigns jobs. See Part A.
- Driver (on the road): uses the TCMS Driver App on their phone to see and complete jobs. See Part B.
Key term: transfer. When your customer sends you a job in TCMS, it is "transferred" to you. It then appears in your own TCMS account, ready for you to assign.
Before you start
Check you have the following. If anything is missing, email support@yojee.com.
- A Dispatcher login (email and password) and your company's TCMS web address:
[SLUG].dispatcher.yojee.com - The mobile number of each driver who will do the jobs
- The plate number of each vehicle those drivers will use
Part A: Dispatcher (office)Step 1: Log in
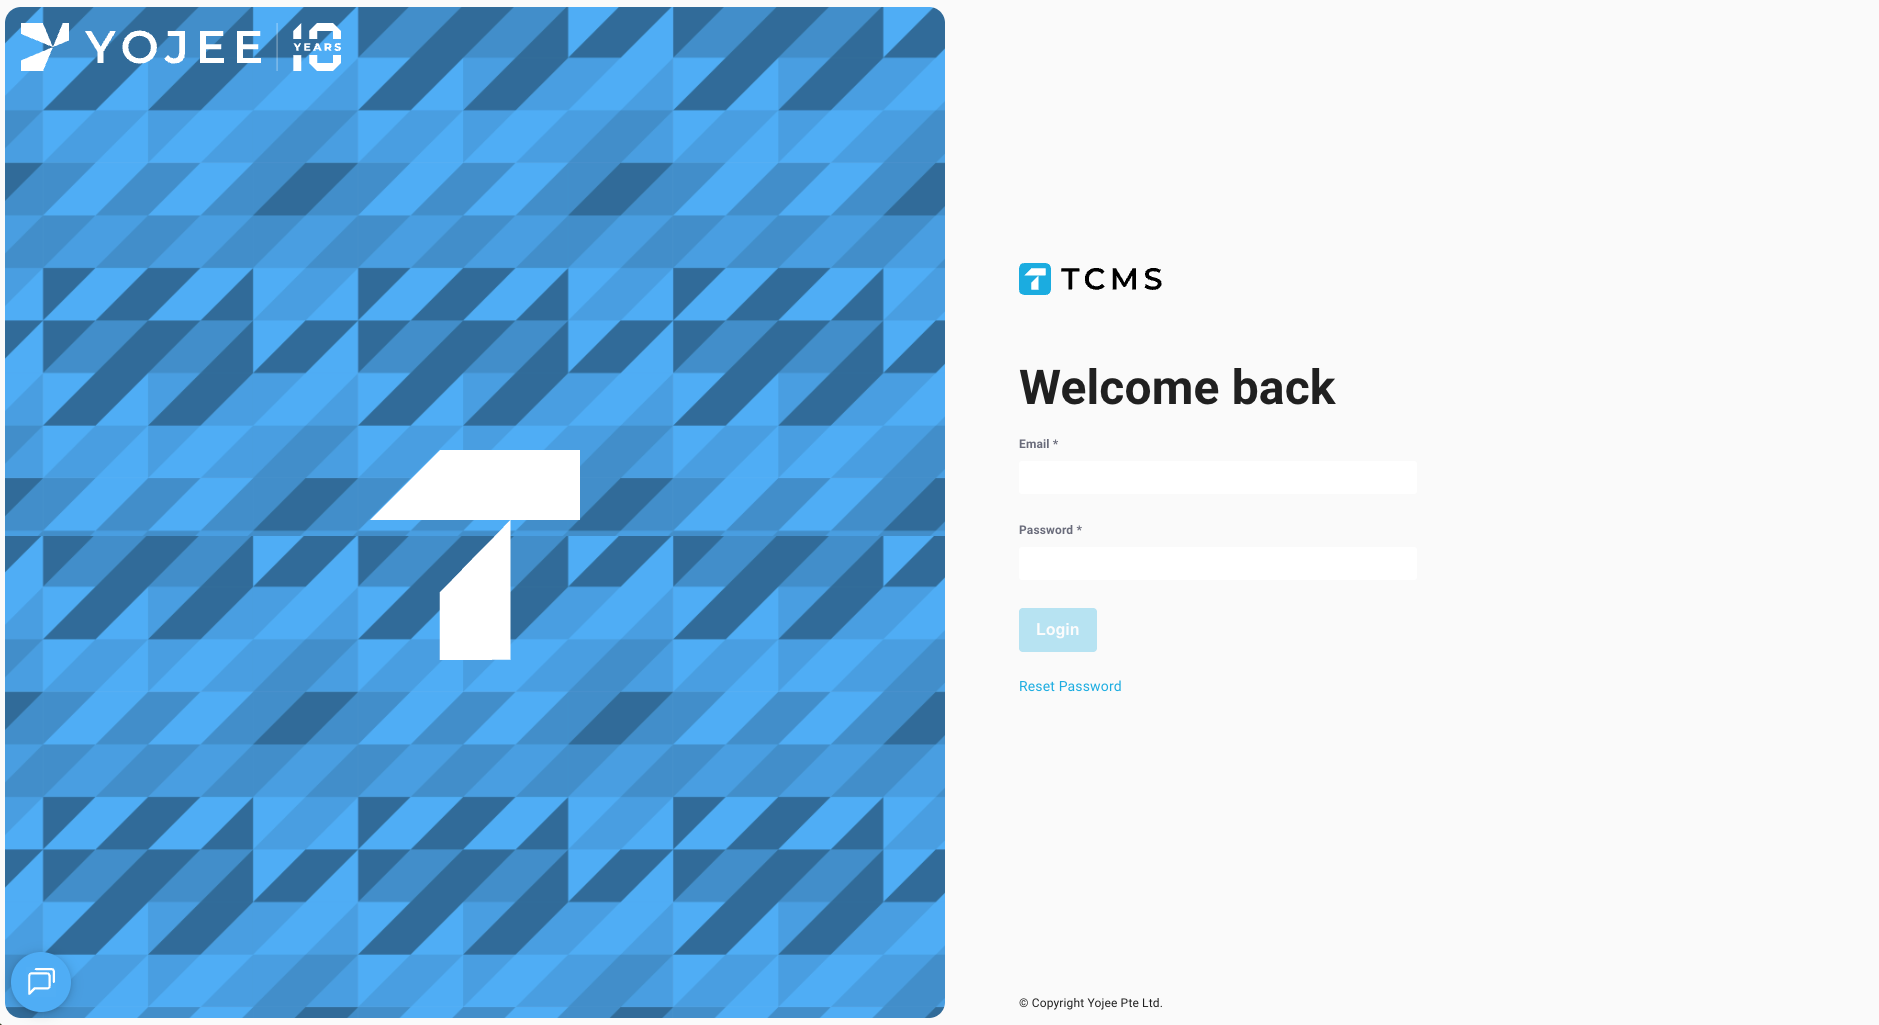
- Go to
https://[SLUG].dispatcher.yojee.comin Chrome. - Enter your email and password.
- Select Log in.
Step 2: Add your drivers (one-off)
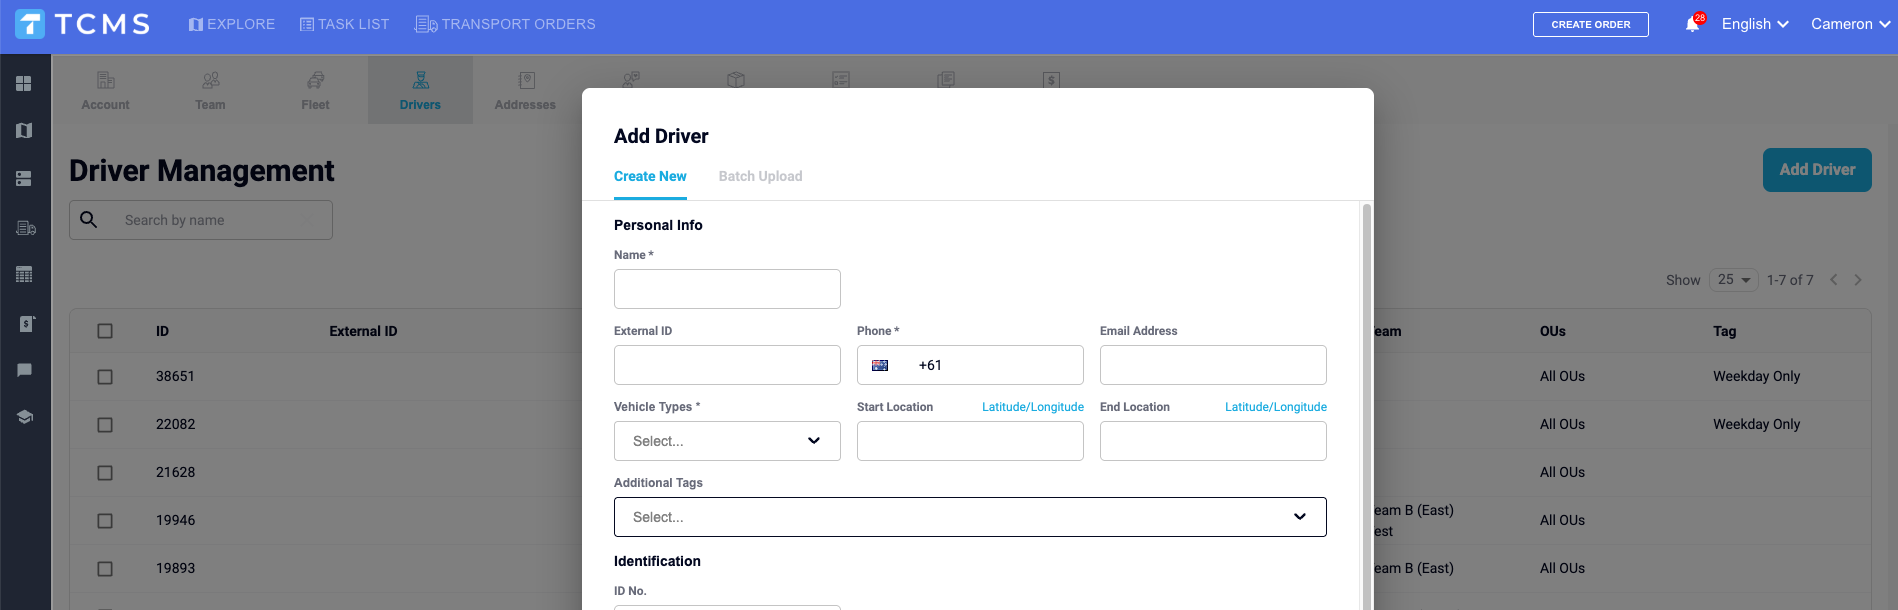
Do this once per driver, before their first job.
- Select the Profile menu (top right), then Manage.
- Select Drivers, then All Drivers.
- Select Add Driver.
- Enter Name, Phone Number and Type of Transportation.
- Select Save.
Phone number format: include the country code and drop the leading 0. Example: a mobile of 0412 345 678 is entered as +61 412 345 678. The driver must log in with exactly this number.
Step 3: Add your vehicles (one-off)
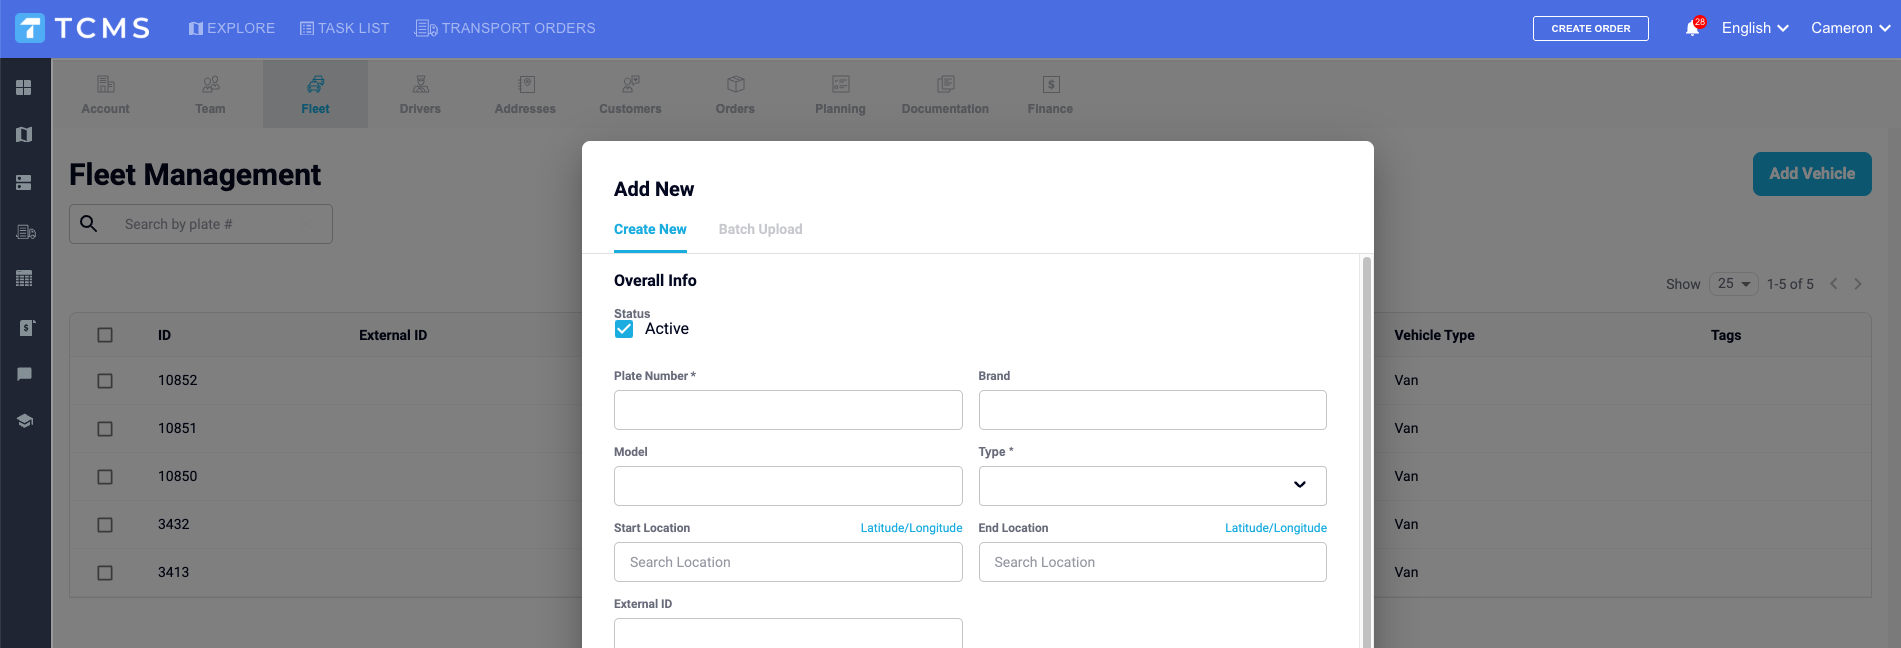
- Go to Manage > Fleet > Vehicles.
- Select Add Vehicle, complete the required fields, then select Save.
You link a vehicle to a driver from the driver list when you assign work (Step 5). Select no vehicle next to the driver's name and pick the plate.
Step 4: Find and accept your new jobs

- Go to Transport Orders.
- Filter to Acceptable orders. These are jobs sent to you that you have not yet accepted or declined.
- Select the jobs, then select Accept. Confirm with Accept.
If you cannot do a job, select it and choose Decline instead, so your customer can reallocate it.
Step 5: Assign jobs to a driver (recommended: Quick Assign)
Quick Assign is the fastest way to give jobs to a driver. It does not reorder stops, so the driver works through them in the app.
From Transport Orders
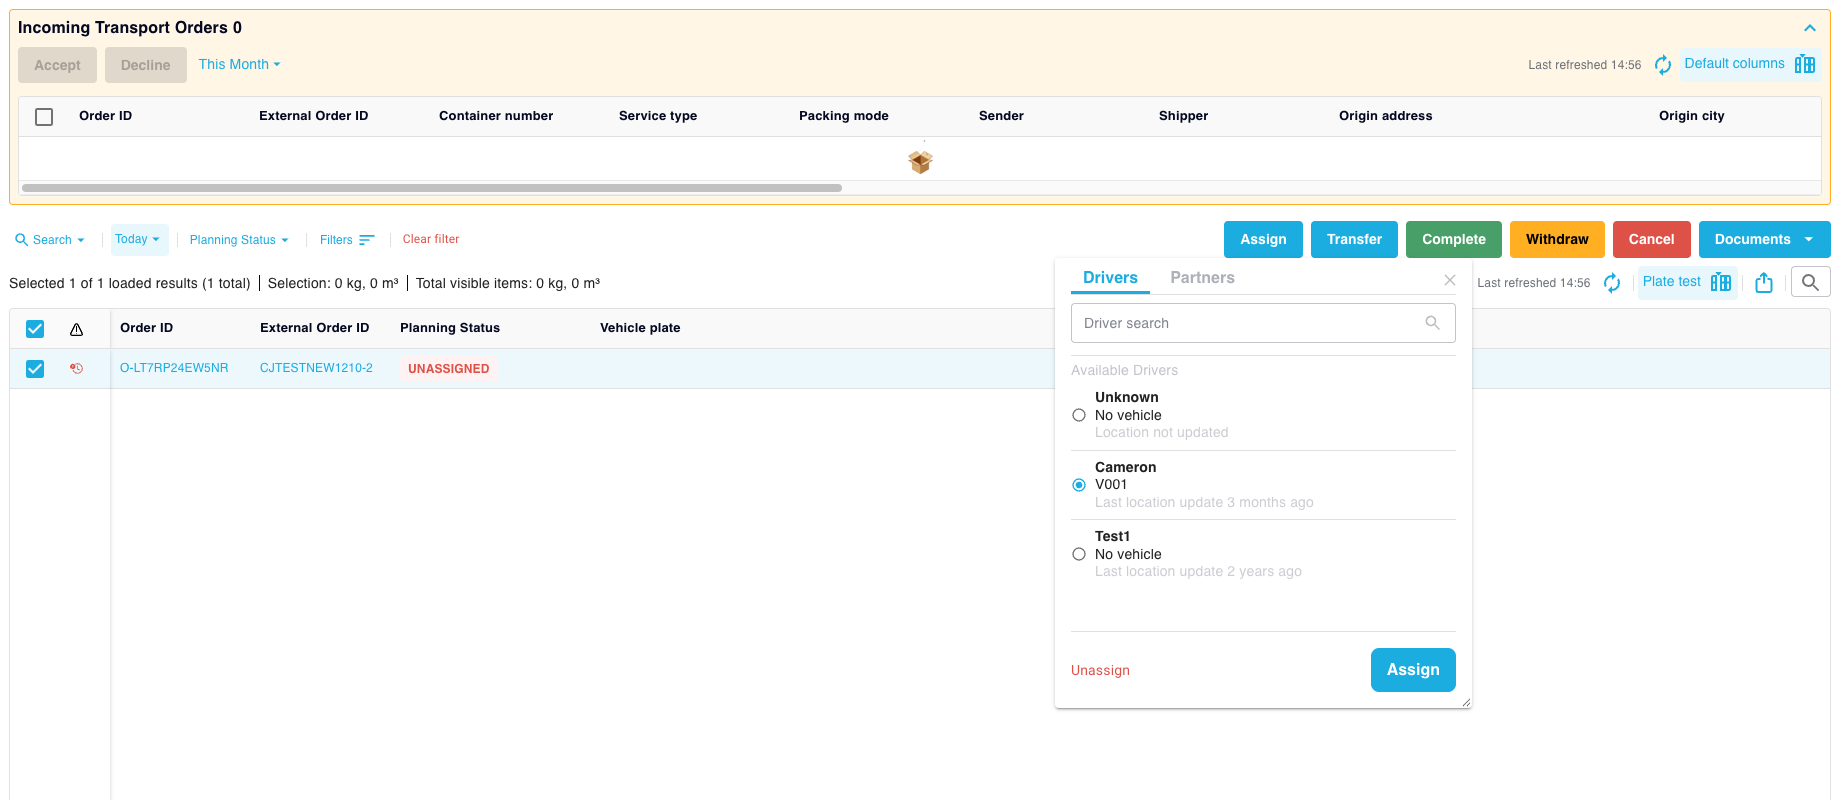
- Filter Planning Status to Can be assigned.
- Select the jobs.
- Select Assign, choose the Driver, then select Assign.
- Confirm by selecting Assign again.
From Explore or Task List
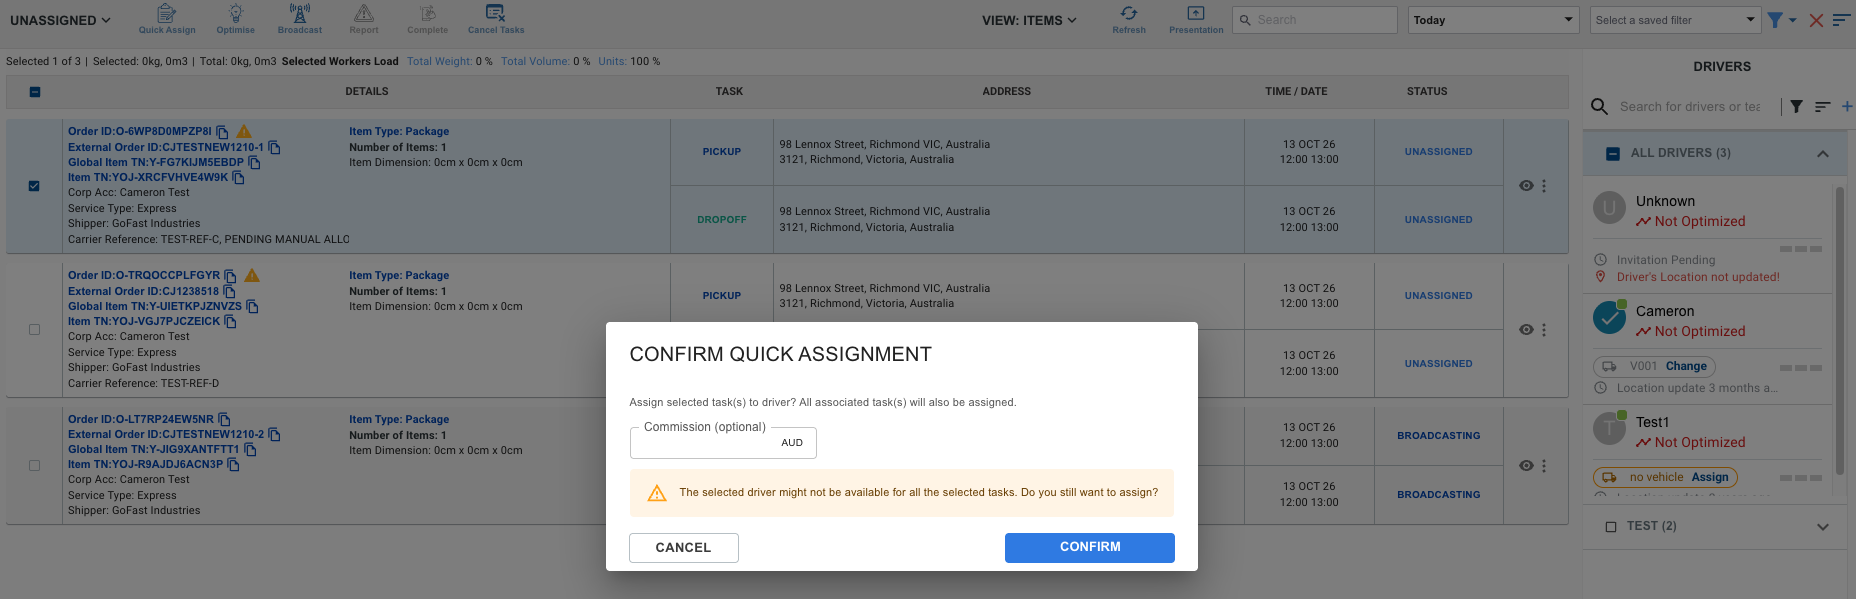
- Set the filter in top left to UNASSIGNED
- Select the unassigned jobs.
- Pick the driver from the list on the right. A green dot means the driver is online.
- Select Quick Assign, then Confirm.
The driver receives a notification on their phone straight away.
Step 6: Optimise a run (optional)
Optimise builds the best stop order for the day. Use it when a driver has many stops in one day.

- Go to Explore (or Task List).
- Filter to the jobs for one day only (for example, Commit Date: Today).
- Select those jobs, then select the driver on the right.
- Select Optimise on the ribbon bar.
- Set the start and end location and service time, then select Continue.
- Review the suggested route, then select Assign.
Tips to keep Optimise working
- Plan one day at a time. Optimise is a day-route planner. Selecting weeks of old jobs slows it down and causes jobs to be dropped.
- Check dropped jobs. If a job is missing from the route, check its address is valid and its time window falls within the day you are planning.
- If Assign does nothing after Optimise, use Quick Assign (Step 5) and email support@yojee.com with the date, time and driver name.
Step 7: Track progress and proof of delivery
- See where your driver is in Explore.
- Open a job to see its status, photos and signature once the driver completes it.
- Your customer sees the same updates in their Yojee account. You do not need to email them.
Part B: Driver (Yojee Driver App)
Share this section with your drivers.
Step 1: Download the app
Search Yojee TCMS Driver in the App Store (iPhone) or Google Play (Android) and install it.
Step 2: Log in
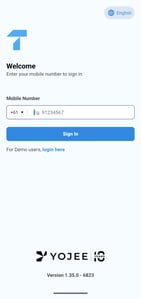
- Open the app and enter your mobile number. Use the same number your office registered. (remove the preceeding '0', i.e. instead of 0412 123 123 type 412 123 123)
- Enter the 6-digit code (OTP) sent to you by SMS, then select Send.
- Your task list appears.
When asked, allow Notifications, Camera, Location and Storage. The app needs these to send you jobs, take photos and share your location with the office.
Step 3: See your jobs
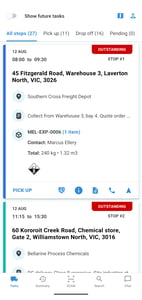
- Tasks page shows all jobs assigned to you
- Tap a job to see pickup and drop-off details, from each task card you can open google maps with the driving directions, call the contact, or start the Pickup or Dropoff.
- Use the calendar to see other days. A dot under a date means you have jobs that day.
Step 4: Complete a pickup
- Open the job and select Complete pick up.
- Check the item details, then tap Confirm.
- Complete any checks your office has set (for example, photo, name or signature).
- Tap Yes, I am ready to depart.
Step 5: Complete the delivery
Repeat the same steps at the drop-off. Capture the photo, name or signature when asked. This becomes the proof of delivery your customer sees.
Step 6: If you cannot complete a job
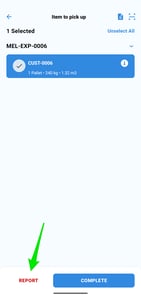
- Start the job by selecting Pick Up or Drop Off
- Tap Report.
- Choose the reason that fits, or Other reason and type what happened.
- Upload a photo as evidence if requested.
The job goes back to your office to sort out.
Troubleshooting
| Problem | What to do |
|---|---|
| Driver cannot log in | Check the number in Manage > Drivers matches the phone exactly, with country code and no leading 0. |
| Driver is not getting jobs | Check the jobs are assigned to that driver, and that the driver has notifications switched on. |
| Driver location shows as not updated | Ask the driver to open the app and allow Location. |
| New jobs from your customer are not showing | Refresh the page. Check your date filter covers the job's date. |
| Optimise drops jobs or Assign does nothing | Use Quick Assign (Part A, Step 5). Email support@yojee.com with the date, time and driver. |
Need help?
- Email: support@yojee.com (include your company name, the order number and a screenshot)
- Help Centre: https://help.yojee.com
- Driver app videos: https://help.yojee.com/knowledge/yojee-driver-app-walkthrough
Related articles
- Quick Assign: https://help.yojee.com/knowledge/quick-assign
- Optimising Routes with Yojee: https://help.yojee.com/knowledge/optimise
- Adding and Managing Drivers: https://help.yojee.com/knowledge/add-a-new-driver
- Add a Vehicle and Link to your Driver: https://help.yojee.com/knowledge/add-a-vehicle-and-link-to-your-driver
- Driver App, Login and Settings: https://help.yojee.com/knowledge/driver-app-1
- Driver App, Managing Orders: https://help.yojee.com/knowledge/ways-to-complete-your-order